
Hey – While I made this I was with child in utero. Now I am with child in arms, pretty much all of the time. Little Isabelle was born October 22nd and I wrote the story of her birth on my wonderful birth center’s blog (yes that means no pain medication.. whaaat?!) You can read about it here.
When I first met my husband, Philip, he was living in a true “bachelor” house… that was pink. It was a big house built in the 1940’s. Some walls were painted bright red and some were painted bright turquoise, the hardwood floors were painted dark brown to seal in the cat urine stench from the previous owner.
There were holes in the walls that invited roaches to move in and there was only one small working window air conditioning unit. This made it pretty miserable during the hot Florida summers. So when we wed in the summer of 2010, I, maybe not so kindly, suggested this wasn’t a good place for a family with an upcoming baby to live. A month later, we packed up and abandoned ship.
Fast forward a year later, the house was abandoned and the owner, my father-in-law, decided it was time to tear down the elderly pink house. The day before it was scheduled to be demolished, with my father-in-law’s permission, I went into the house and salvaged the original glass door knobs.

I spent a lot of months trying to come up with the best way to attach these door knobs to a piece of wood to make a coat rack. Over at Infarrantly Creative, she used a resin to fill the hole and attach a screw, but the whole process of mixing the resin and letting it set was very intimidating to me. Being Brook let me know that she had cut the original long screw to size to make her coat hanger. It seemed simple enough, but she commented that it was very difficult. I knew there had to be an easier way, so I brought a door knob with me to home depot on a quest to find something that would enable me to make a simple coat rack. Here is what I came up with.

What you’ll need:
- A piece of wood, cut at desired length, stained, sealed, or painted to your liking.
- Glass door knobs
- Same amount of cap screws that fit
- Drill Gun
- Drill bit fit to the thread of the screw
- Spade bit fit to the head of the screw
Also useful but not pictured; vice grips or pliers, tape measure, and a wire cutter.
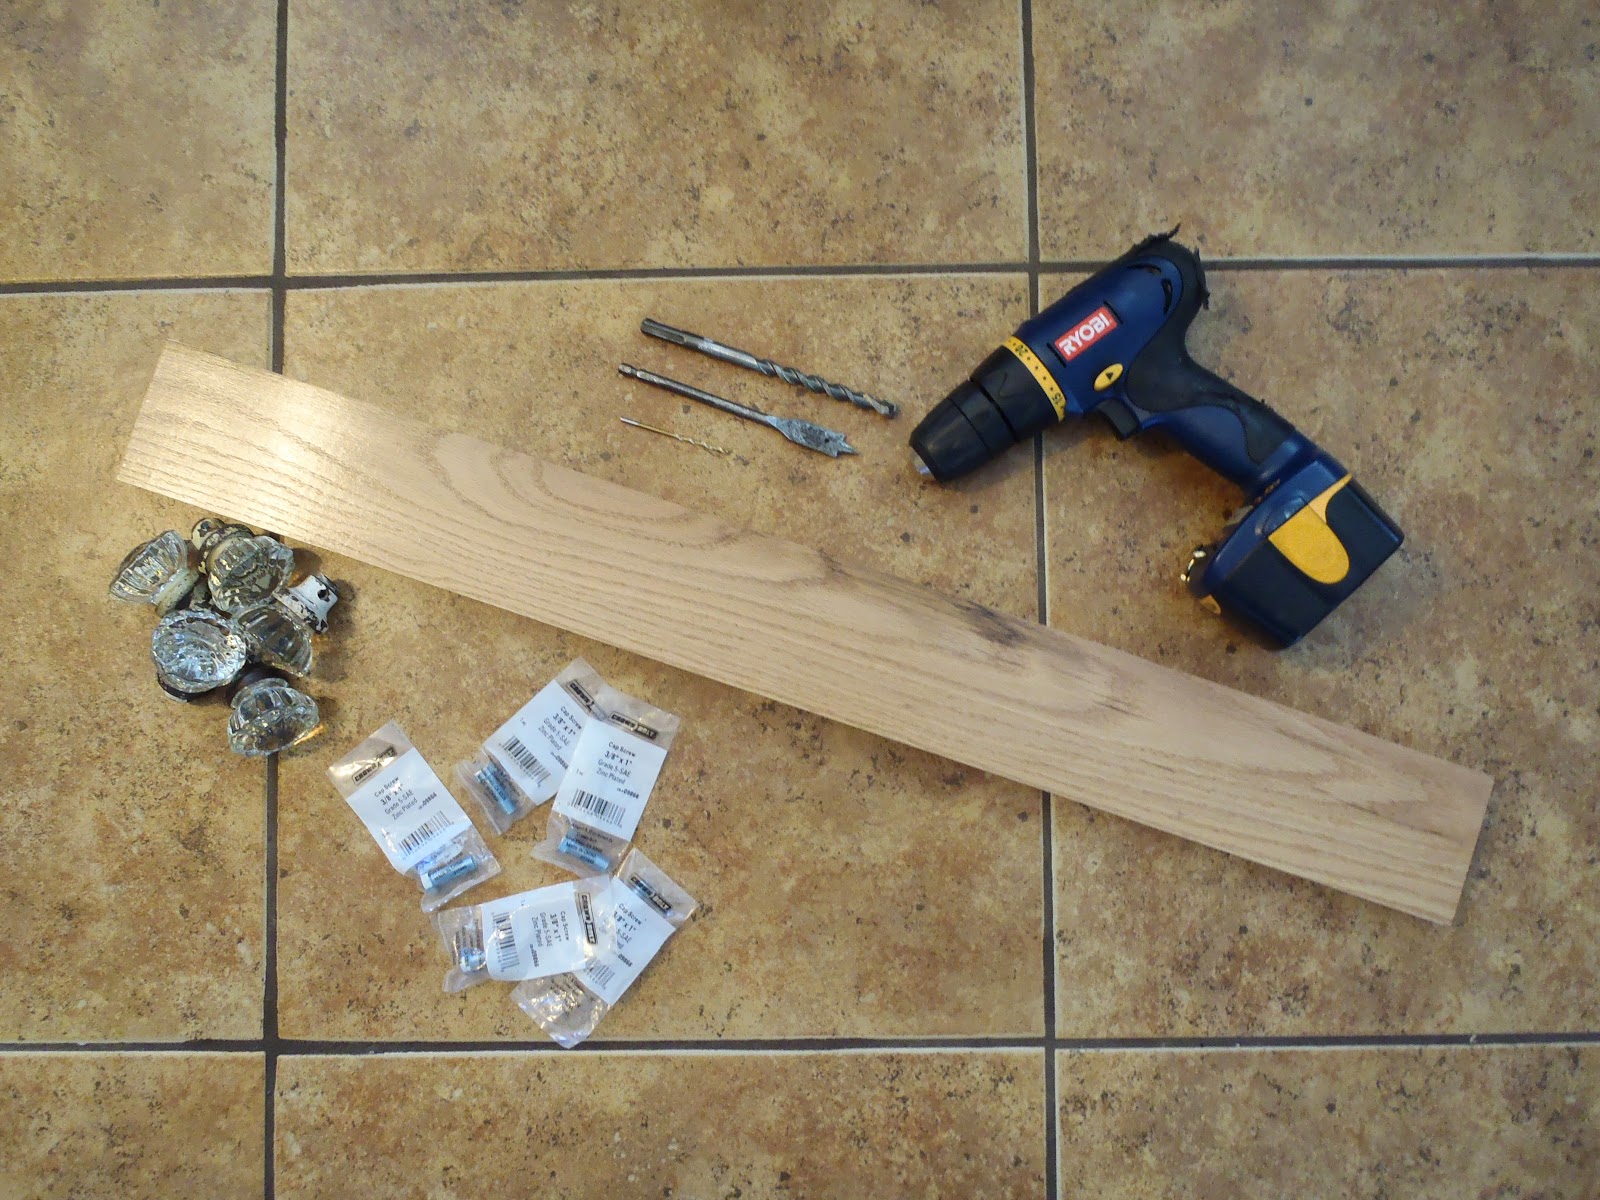
What makes this process simple is using cap screws. They are located on the nail and screw aisle at Home Depot. The size that fit my door knobs were 3/8″ x 1″ and I believe all antique glass door knobs should be a universal size, so hopefully these will fit your door knobs as well. Now, if the thread of your door knobs are in rough shape like mine were, it will take some work to get the screws to fit with the thread. This is where the vice grips come in handy. I simply kept on rotating the screw in until it stuck, took it back out, then screwed it back in, using some force and repeating until the threads matched. Some door knobs took more time than others and some took no force at all. Keep in mind they do not have to fit in all the way, only enough to secure them tightly to the wood.

Now it’s time to fit the screws to the wood. First, mark where you want your door knobs to be placed. My piece of wood is 32 inches in length. So I placed one knob in the center at 16 inches, placed two 2 inches from the edges, and placed two more evenly between them, leaving me with five equally spaced apart.

After you have everything marked, take your spade bit (mine measured 5/8″) and drill in just enough to fit the head of the screw in level with the wood. Repeat for each knob.
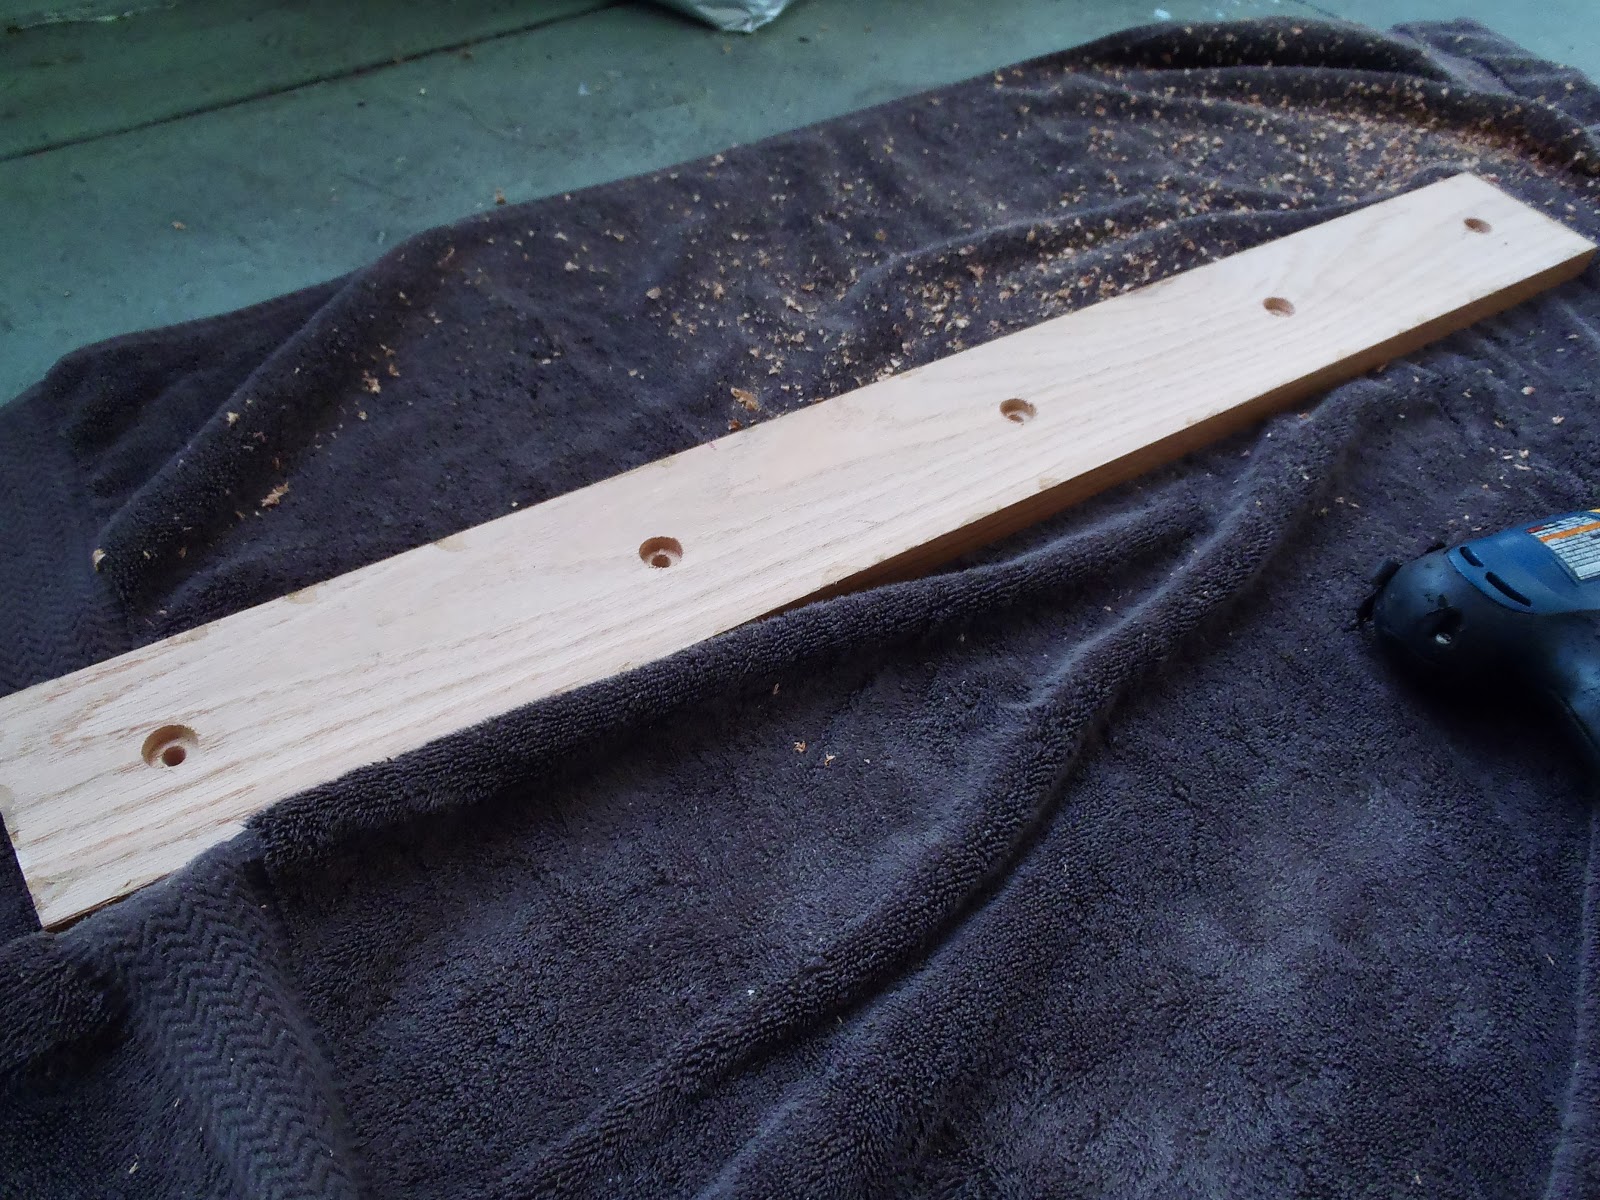
Then, take your drill bit (mine measured 3/8″) and drill through the wood, making sure it is centered to the spade bit indent. Note: The drill bit I used was made for concrete, whoops. I didn’t have any other bit that fit and not wanting to purchase one, I used what I had on hand. It did take a considerable amount of time to drill through the wood, which I’m sure is due to this fact. I know, this probably wasn’t the best decision, but I survived with all of my fingers and toes and legs and arms.

After all of the holes had been drilled, I flipped the board over to find this.
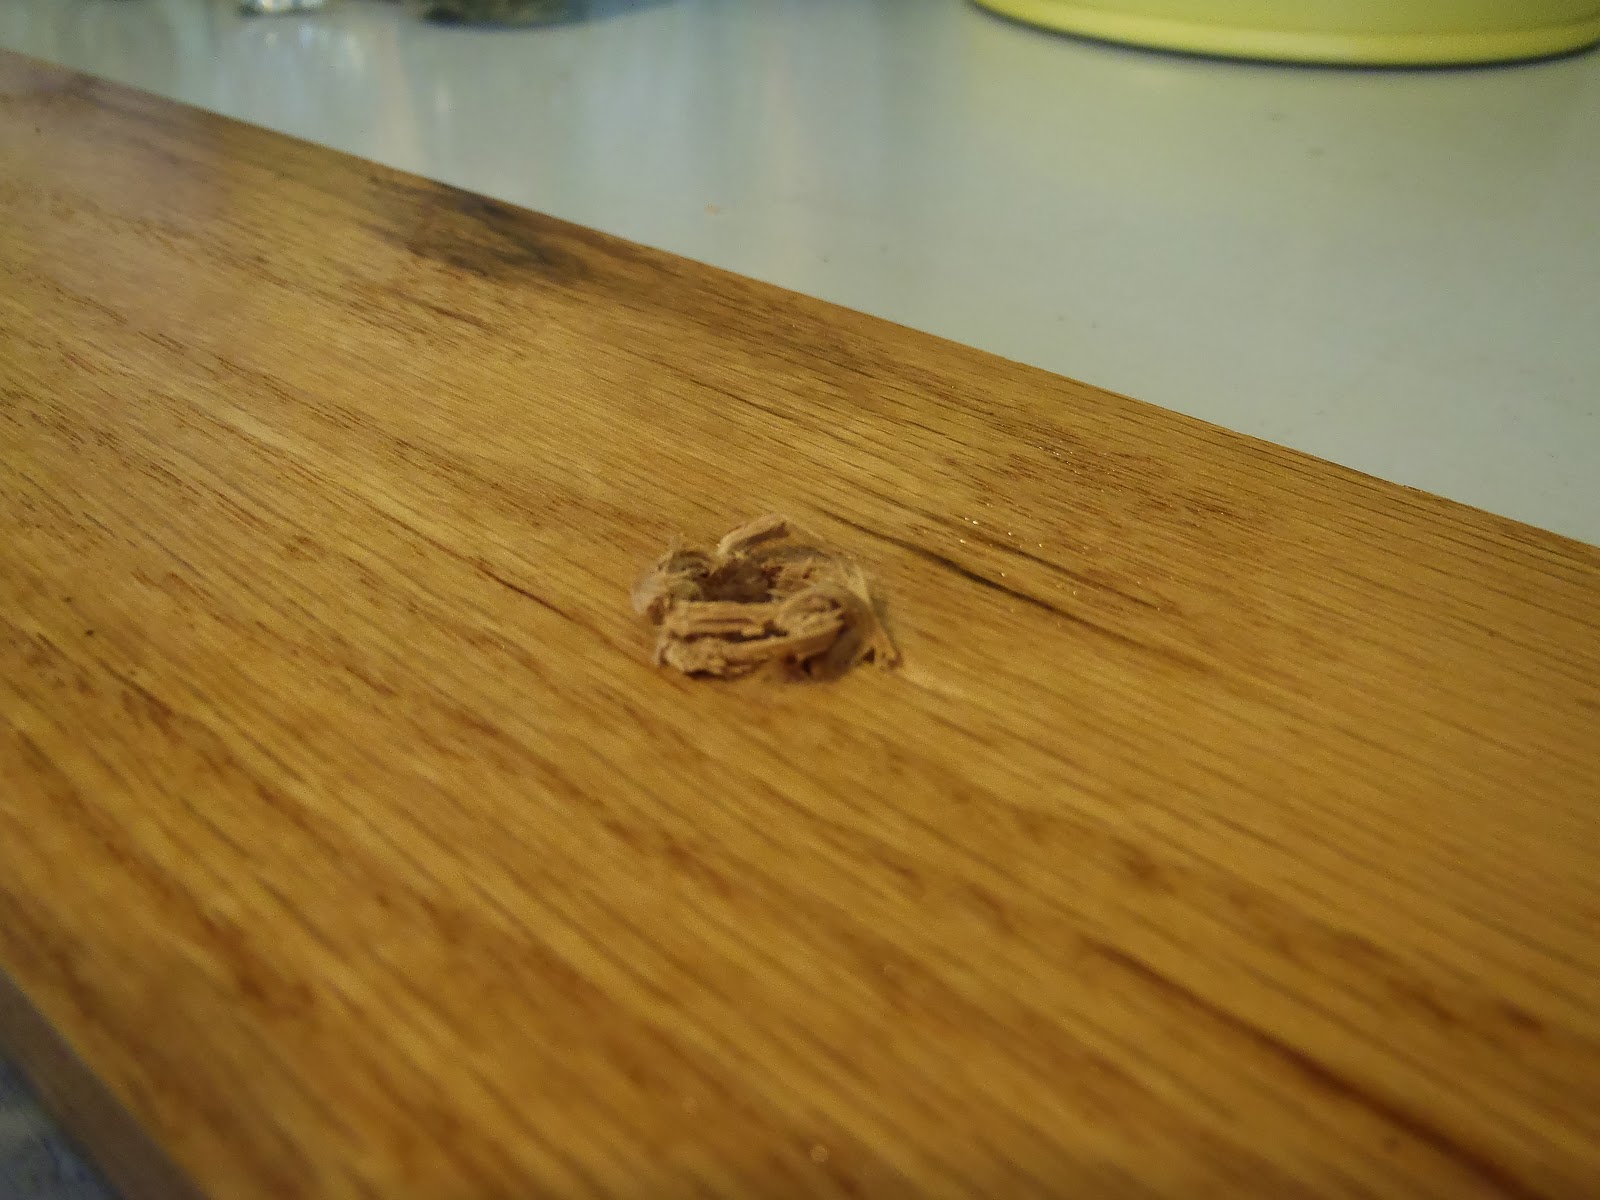
It was probably due to the masonry bit I had used. To fix this, I used wire cutters to clip off the excess wood to make everything as level as possible.

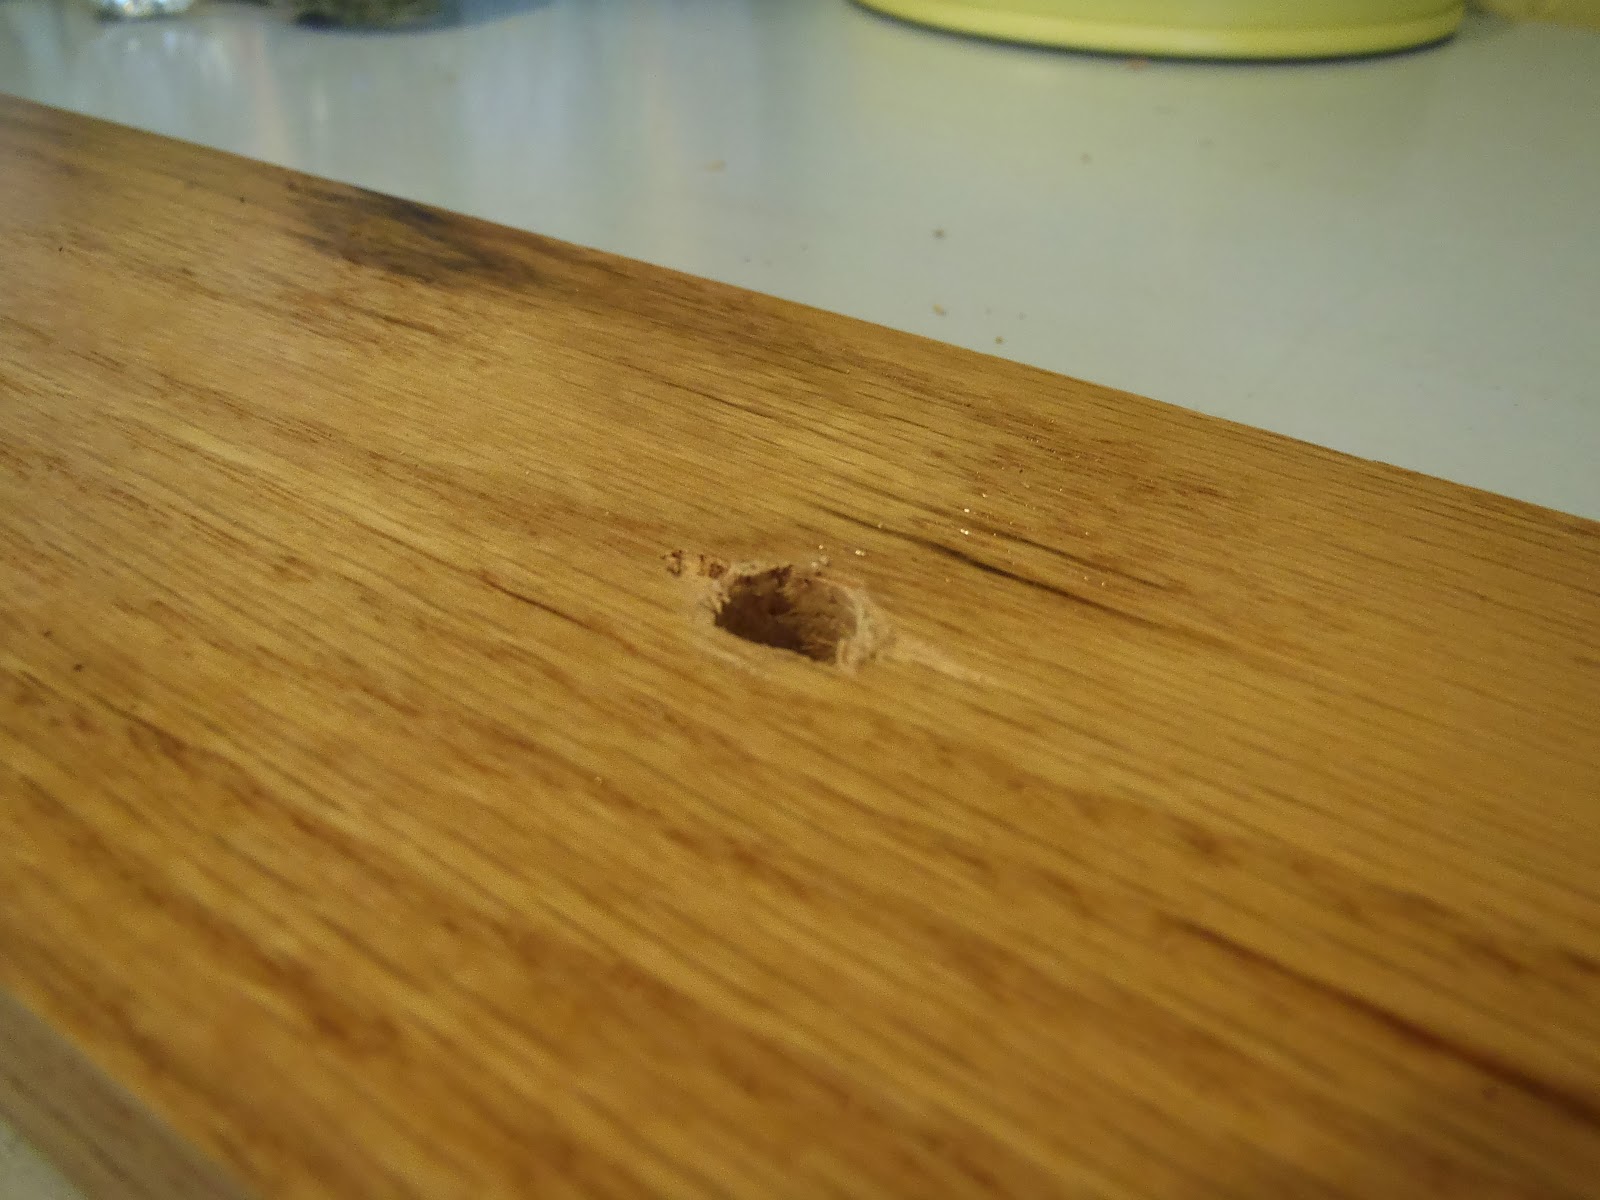
Next is simply putting the cap screw through the hole and twisting the door knob secure to the wood. I’m sure you can adhere the cap screw to the hole using some type of strong glue, but I like knowing that I can remove the door knobs if I ever feel the need.
Lastly, attach to the wall and enjoy your new coat rack. Okay, who am I kidding, coats don’t exist in Florida. Okay, I lied, they exist spontaneously during our random cold fronts. Once the weather gets to 60 degrees, the coats and boots come out of the wood work like magic. Yes, Floridians consider 60 degree weather freezing. So here in the Sunshine State, I will enjoy my new purse rack.


GREAT IDEA! Thanks for linking up to Monday Funday! Sharing on twitter now 🙂
Thank you, Jaime!
Gorgeous! love this..so simple and elegant! Pinning!
Thank you!
On wooden door this glass door knob is perfect but in case of interior glass doors better to make it as sliding door. Thanks for having me here.
After bookmarking your site years ago because I had glass door knobs and wanted to make a coat rack too, I finally made mine, thanks to Covid-19 self-isolation. Sadly, I cannot figure out how to include a photo of my coat rack. But, I am thrilled with the result and thank you very much for the tutorial.
This is so exciting! I’d love to see a picture, can you send it through Instagram?