
It’s week four of the Fall 2018 One Room Challenge and the green bathroom is slowly moving along. There isn’t much left to do for this makeover, actually. I still need to hang proper bath towel hooks, replace the light fixture, add a shelf and accessorize – my favorite part!I didn’t accomplish much this week, besides picking out a new light (thanks to the help of an Instagram poll!) and pulling out my DIY tool belt. This week focused on accessorizing with a super simply DIY brass hand towel holder. Read how to make it yourself below.

Whilst I was browsing on Amazon a few weeks ago (you know, as one does), I came across this brass toilet paper holder and immediately thought it would be perfect as a hand towel holder for the bathroom makeover. Having a desire to stay within a tight budget, I decided to make my own with a brass rod from the hardware store, a wooden dowel, and some fancy tricks I had up my sleeve.

It was ridiculously easy to make but somehow managed to take me all week to finish. You know those projects that seem to sit around waiting to be finished? Or is that just me? This little thing sat on my kitchen island for a solid 5 days before I finally got around to finishing it.
Anyway, it’s simply cutting a wooden dowel to size, drilling two holes, inserting a brass rod and bending it to shape, then inserting a double sided screw into the dowel. Finish it off by hanging a pretty hand towel. This super soft towel I bought from Target is perfect for this project.
DIY Brass Hand Towel Holder
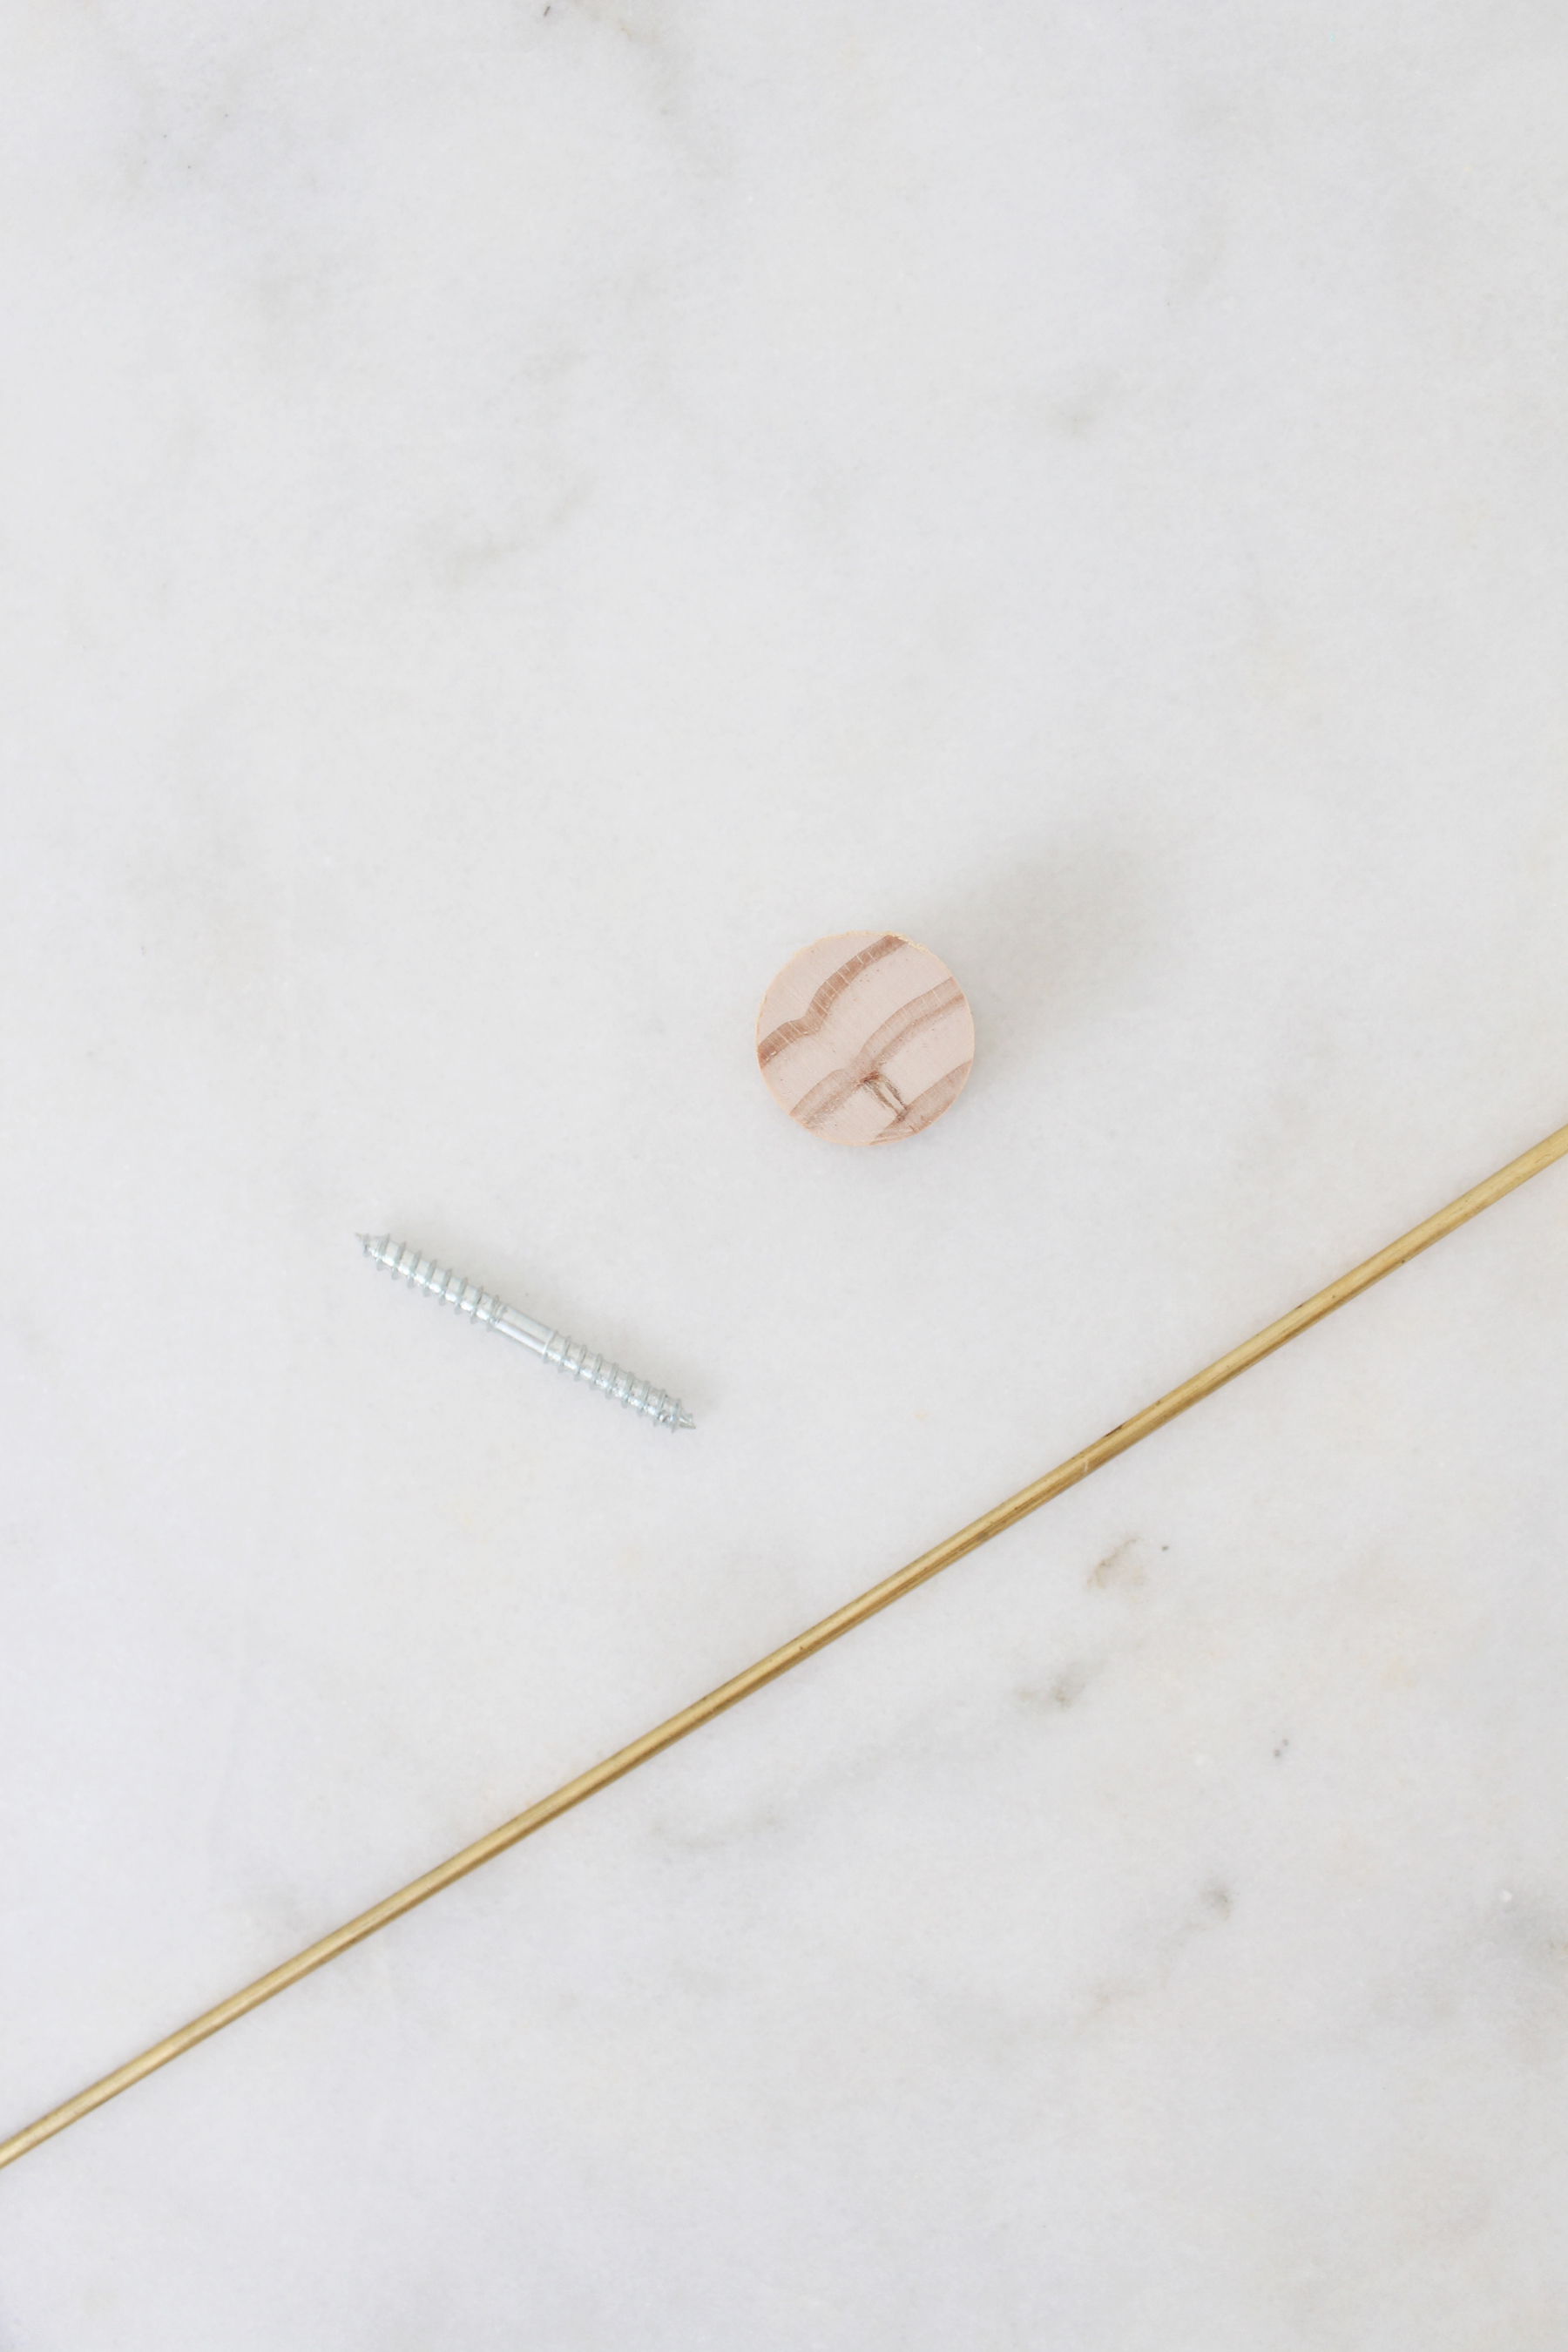
Supplies:
1-inch wood dowel, cut down to 1-inch deep. (I used what I had on hand, which was pine)
double sided screw
5/16-inch drill bit (or whatever size matches the double sided screw)
wood stain (optional)
1/8-inch brass rod (I bought mine from Home Depot)
Instructions:
Start by drilling two holes in the wood dowel piece.
First, using the 5/16-inch drill bit (or whatever size drill bit that is barely the size of your double sided screw), drill half way into the center of the back of the wood dowel, being careful not to drill all the way through. This hole is where the double sided screw will go.
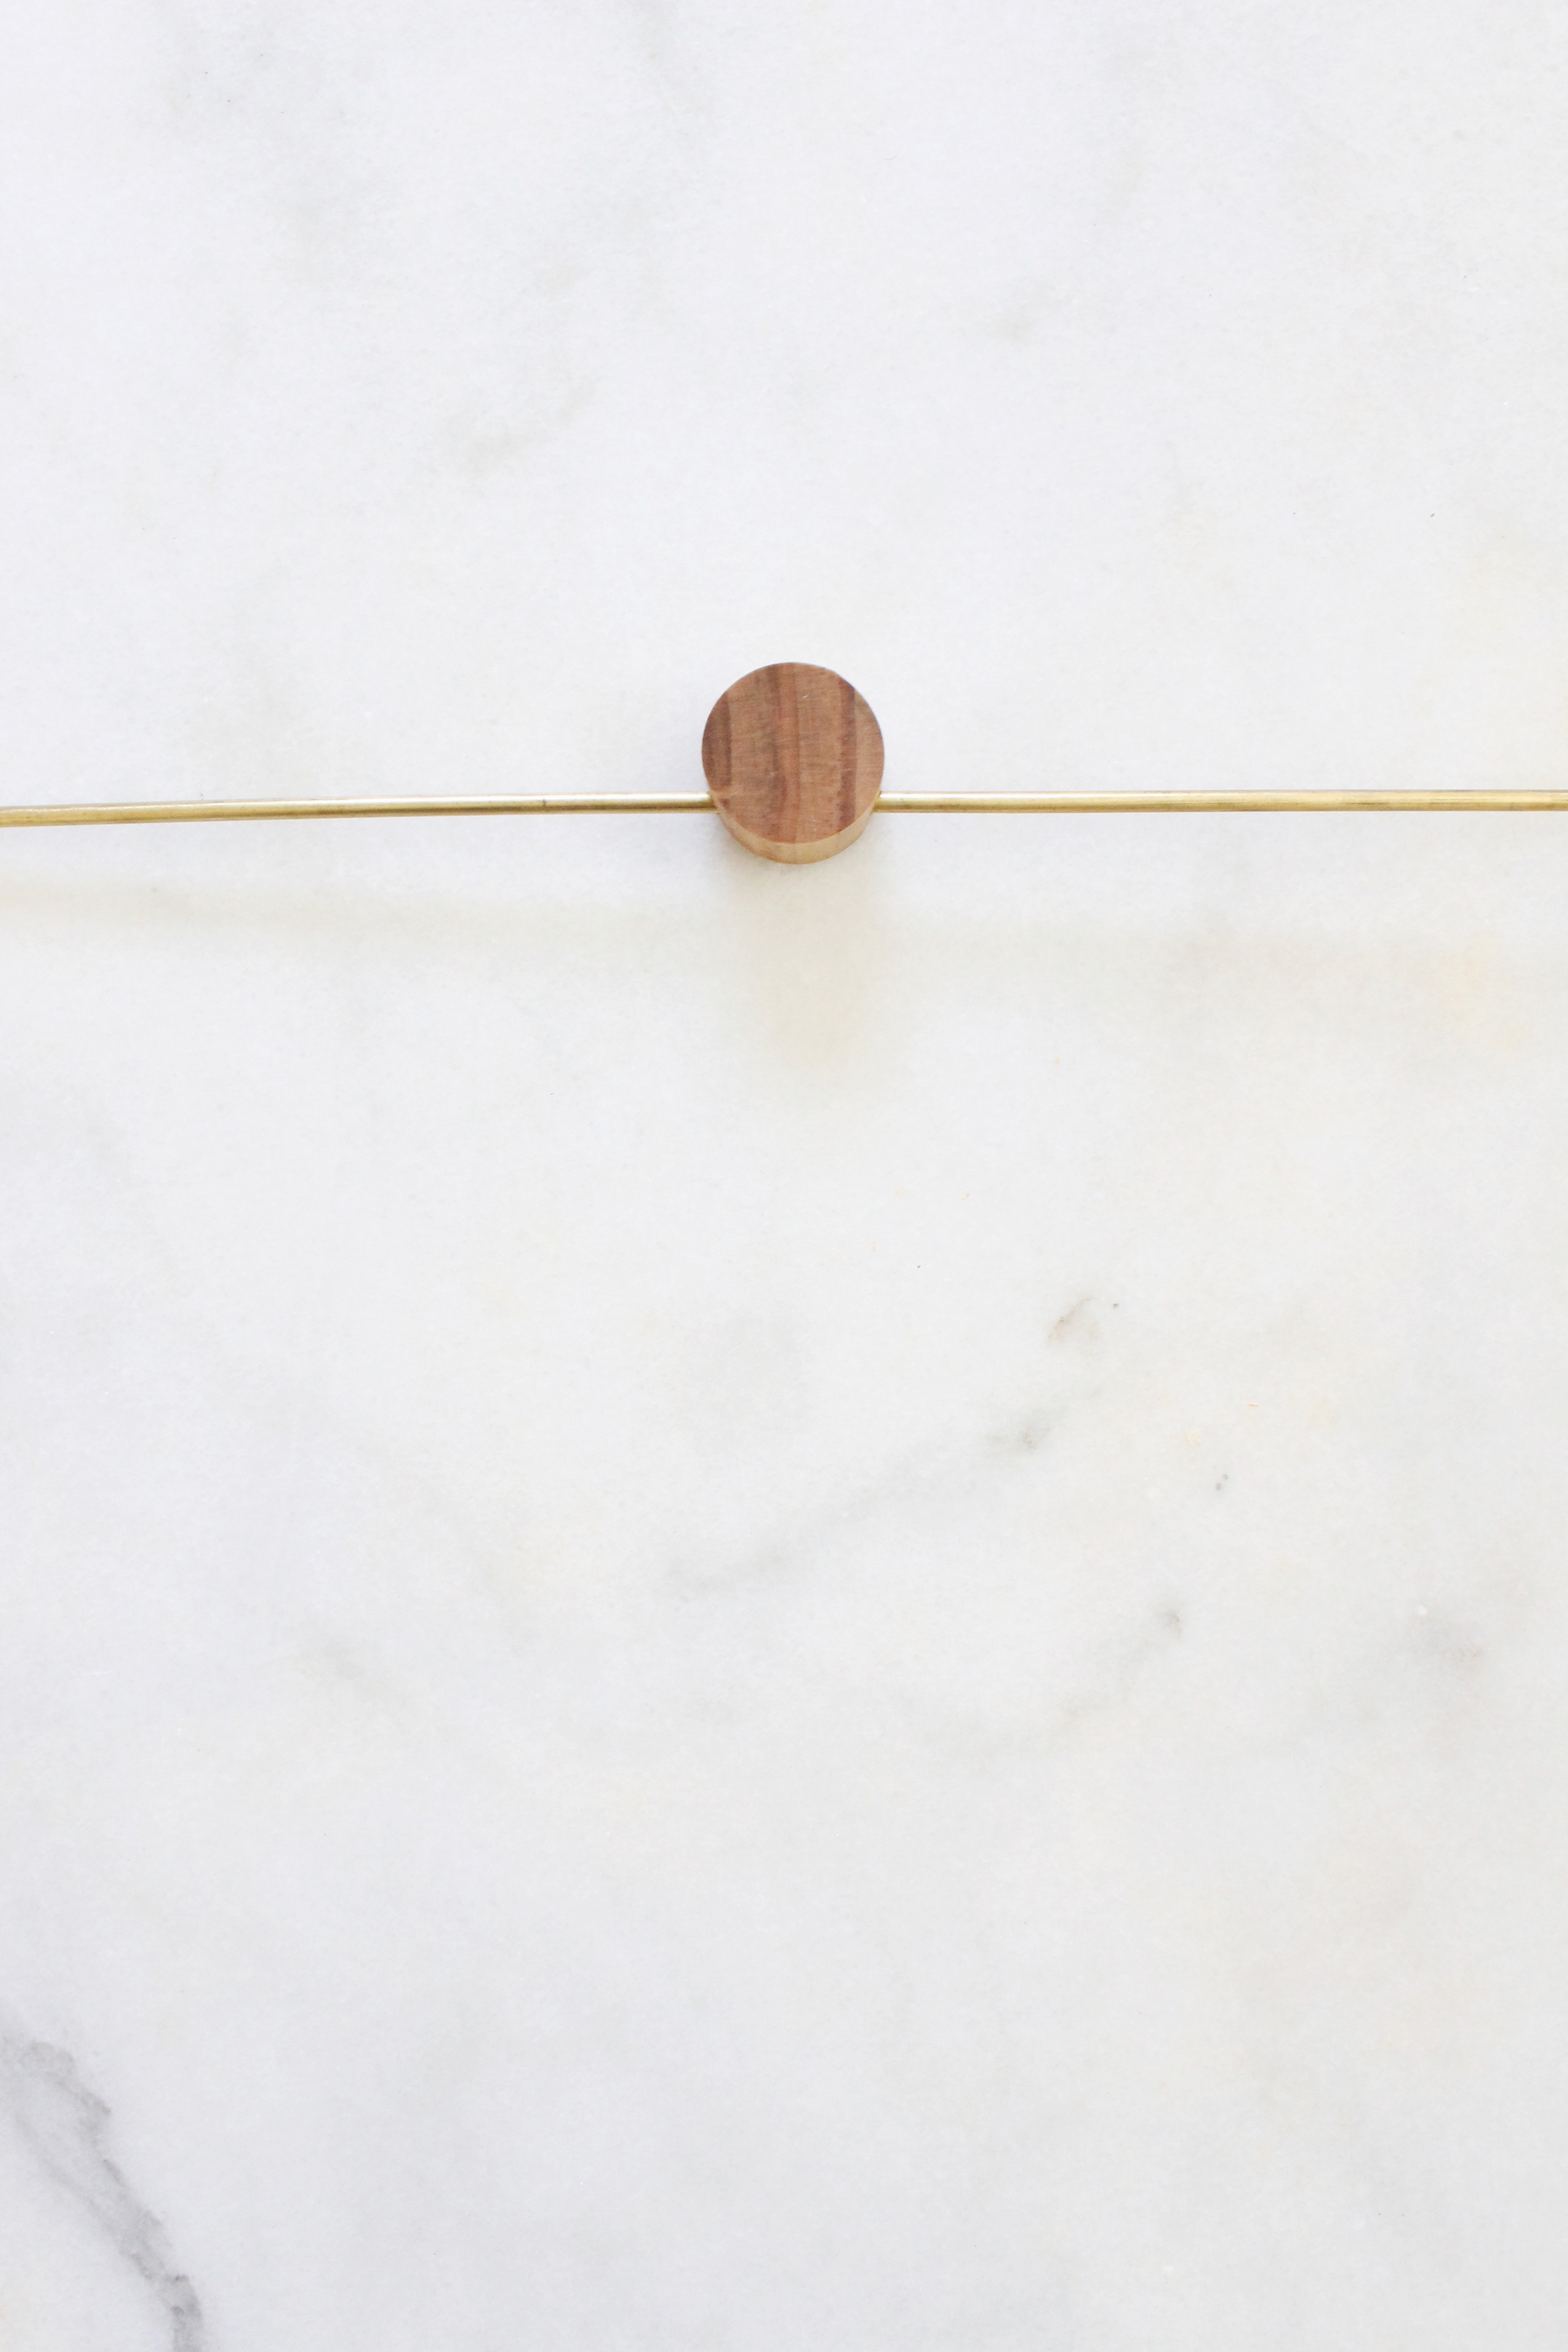
Next, using the 1/8-inch drill bit, drill into the wood dowel from one side and into the other. Drill this hole so that it isn’t perfectly centered in the dowel, but a bit lower so that it won’t intersect with the first hole. Make sure this hole is straight and level. You may need to run the drill bit back and forth to loosen the hole.
Now is the time to stain and seal your wood dowel. I used what I had on hand (are you sensing a theme here?) which was Restore-A-Finish in Walnut followed by Polycrylic.
Once the wood dowel is ready, thread the brass rod through the dowel…
…and bend the two sides down to form the top of a triangle.
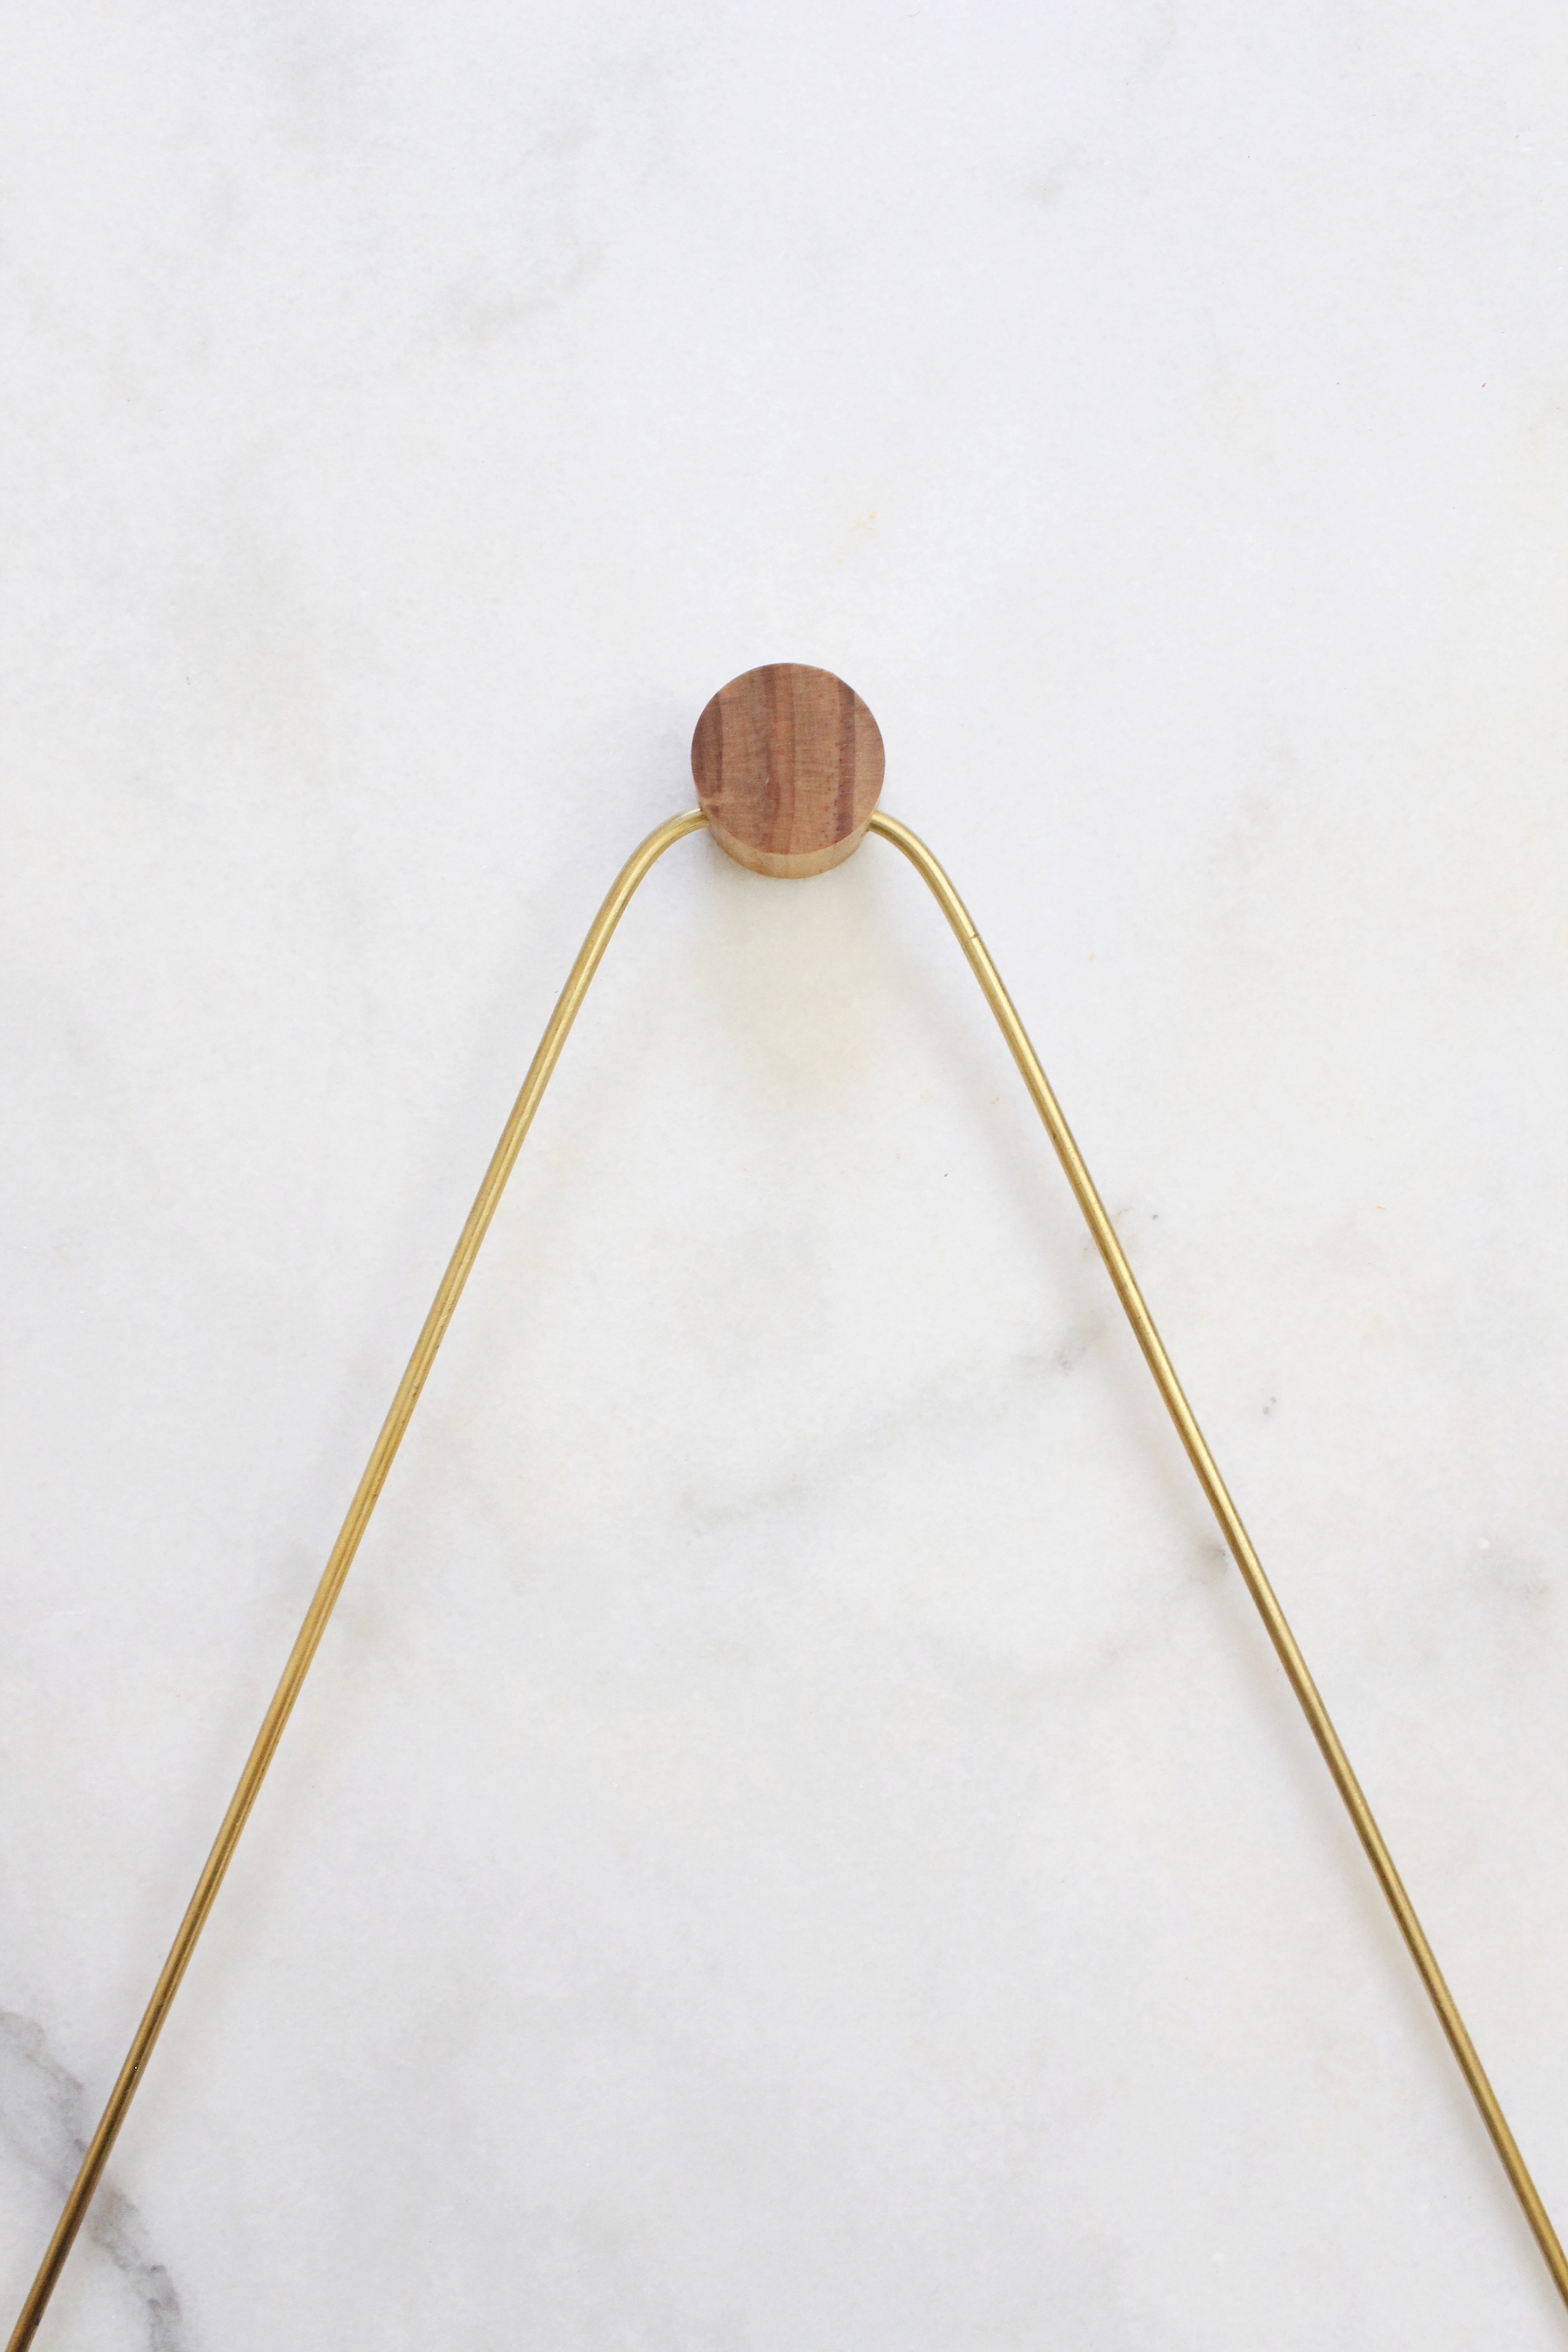
Measure seven inches down on both sides and bend the brass rod inwards.

Finally, gently cut the brass rod. This is best down by using a good quality wire cutter and making small cuts while rotating around the rod. Use a low grit sandpaper to smooth the ends if they turn out rough.
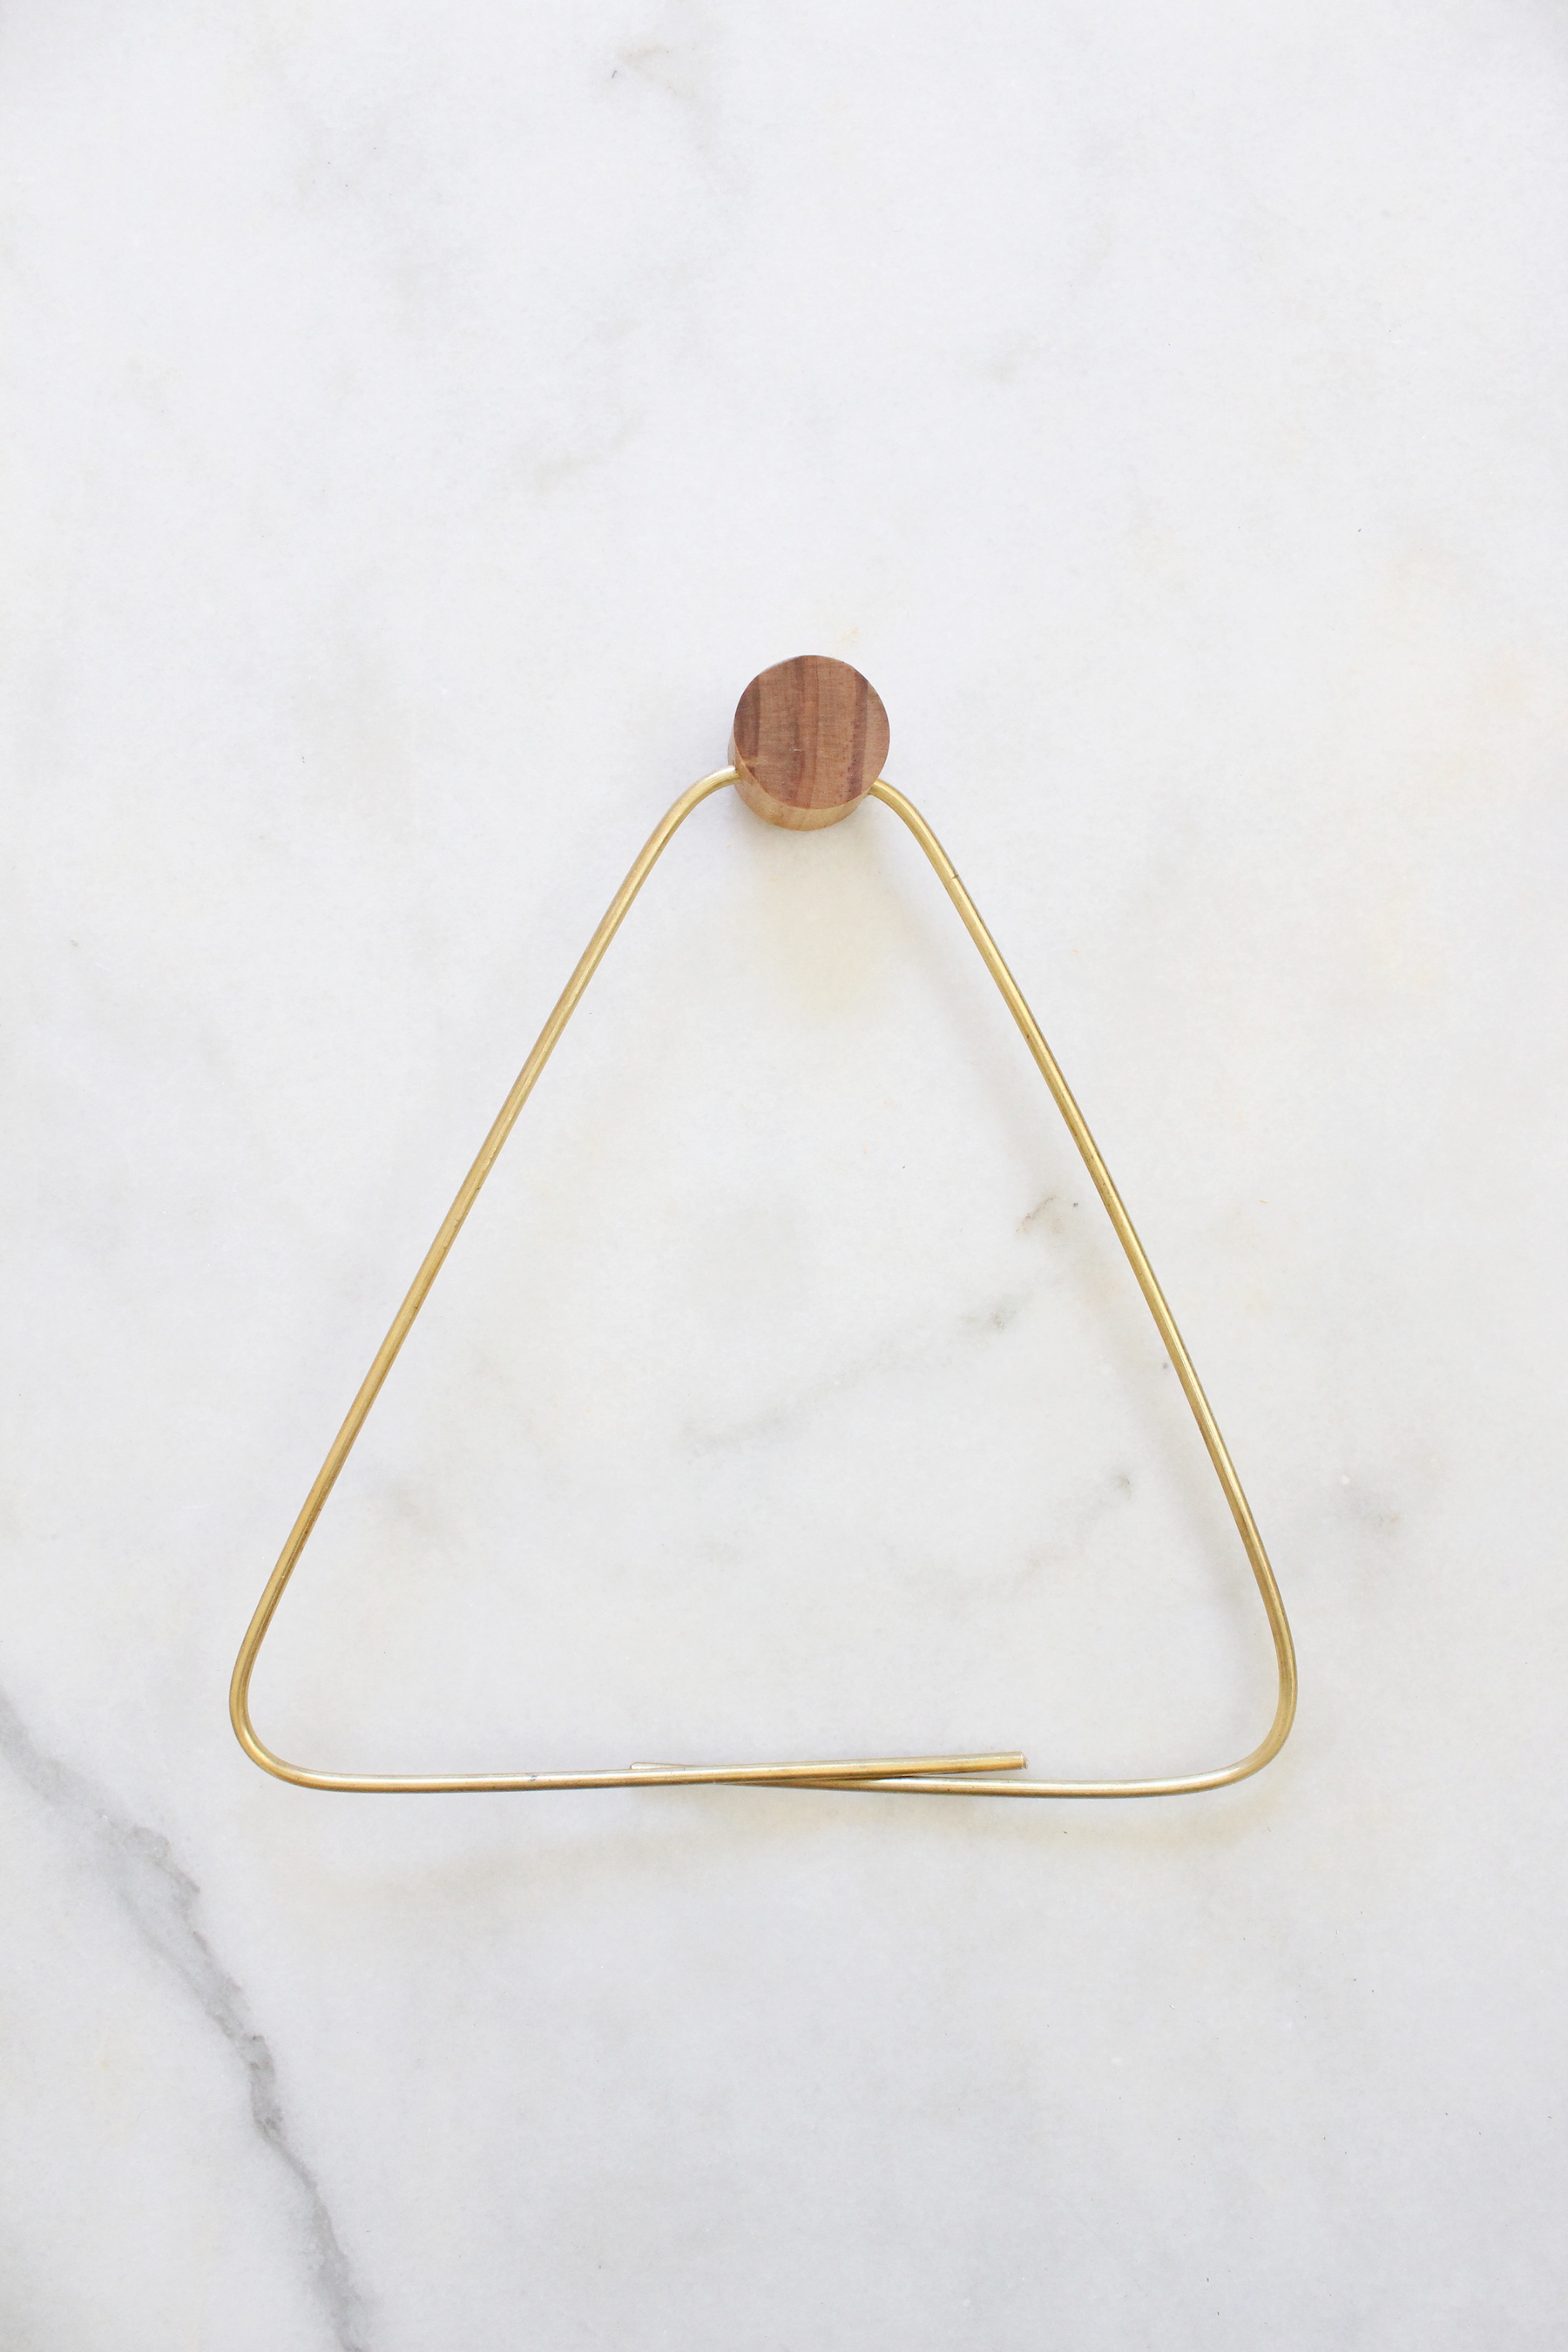
Don’t worry about the ends lining up perfectly, they will be covered by the towel.
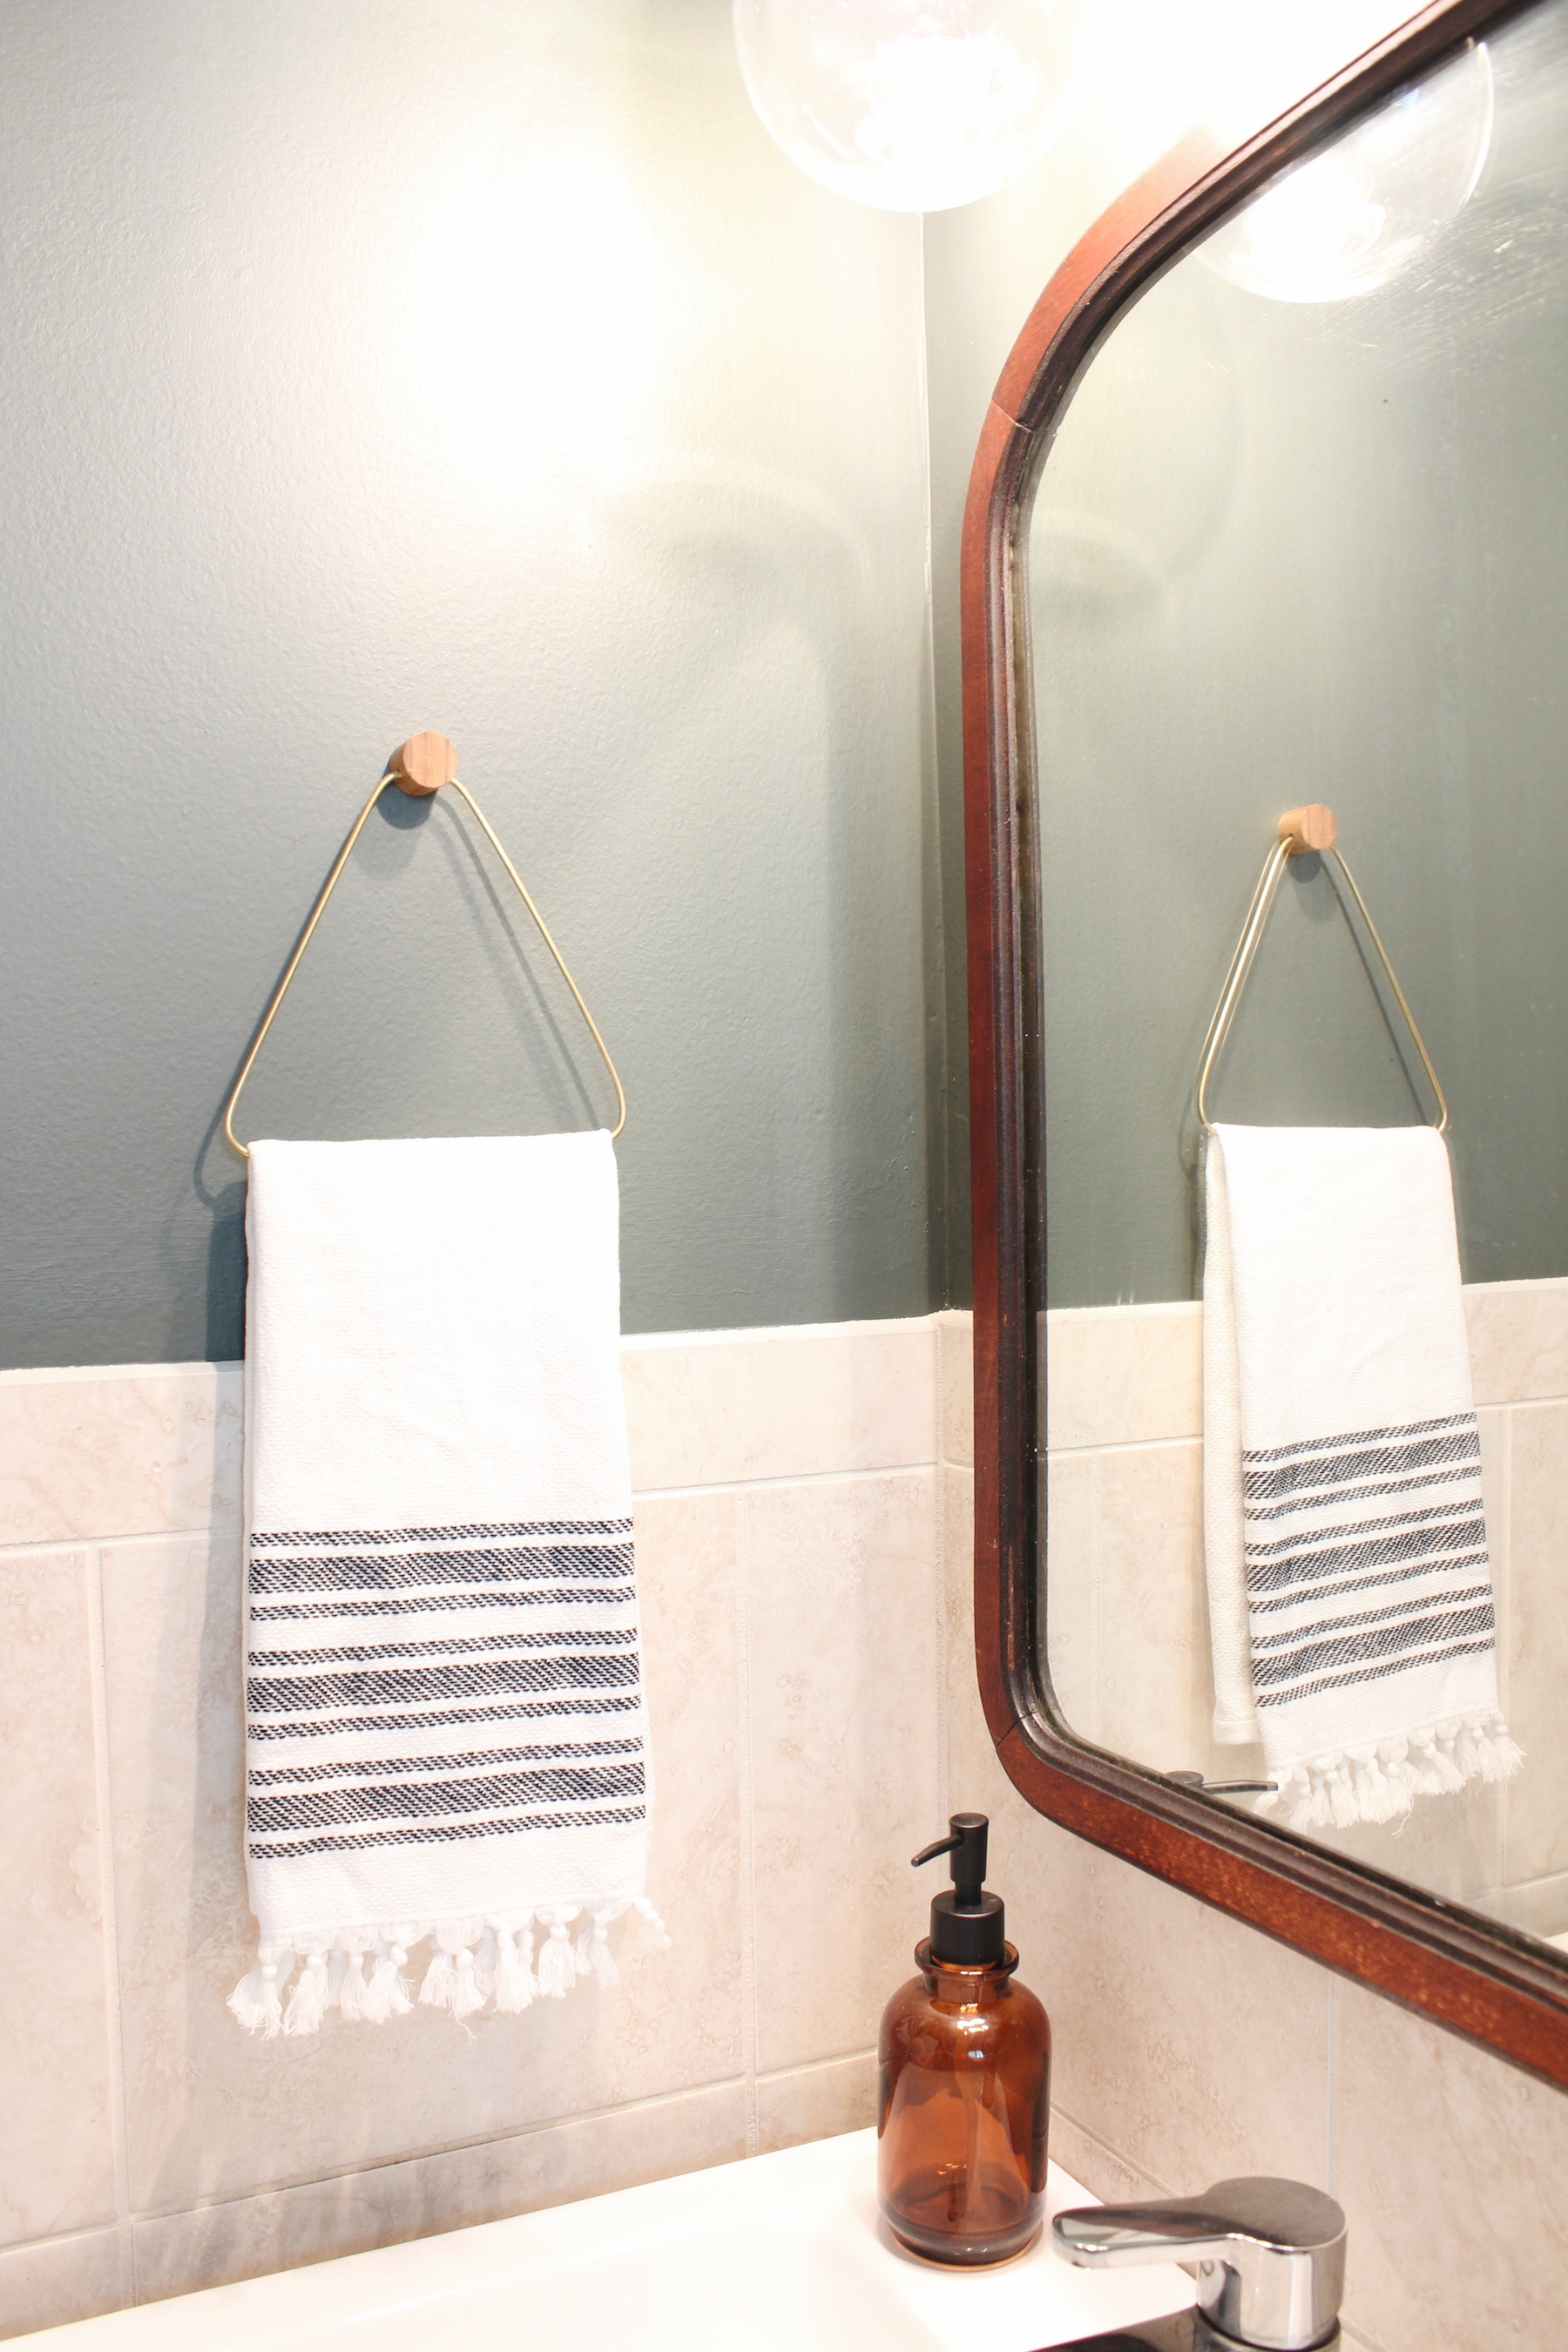
I love how it came out. The bathroom is in the final stretch of the One Room Challenge and I just can. not. wait. to see how it comes out.

I’m also super eager to see how the other participants rooms turn out. Check out the Featured Designers and Guest Participants in over on the ORC blog.


This is such a cute diy! Love how the bathroom is coming along!
Thanks, Katie!
The bathroom is looking terrific! I love the DIY towel bar. What a creative solution!
Thank you, Stacy!
Such sleek and simple. Love this.
That towel holder is amazing! I also love your wall color. Keep it up — only two weeks left!