
I’ve always been a fan of working with clay. In high school I somehow managed to win some art awards for the things I made (it still feels so strange to call them pieces of art). So after over three years of not touching clay, I decided to give it a go by making these little tealight holders out of Sculpey inspired by these cute clay pots.
Here’s what you’ll need to make your own:
A few packets of Sculpey (2-3 per house depending on the size)
Spray paint
Craft paint
A stylus tool (or a sewing needle, which is what I used)
Disclaimer: I have no idea what I’m really doing.
To begin, make templates by cutting out and taping together little paper houses.
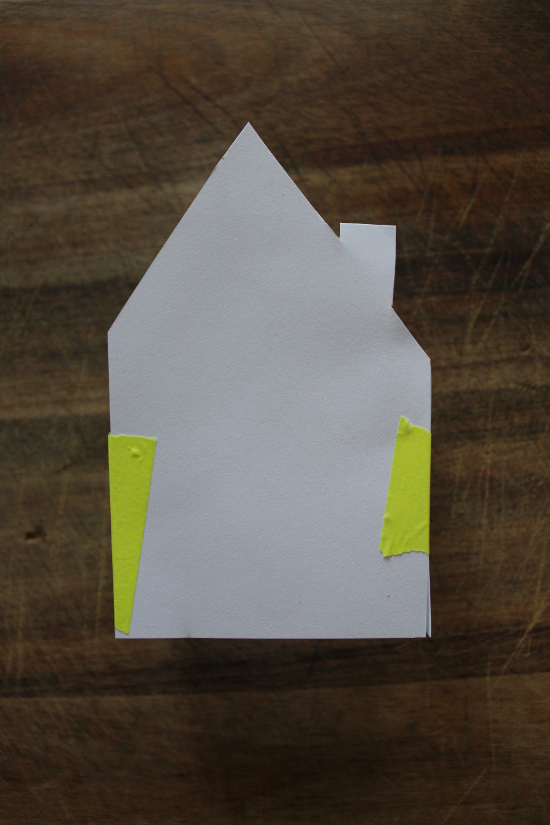
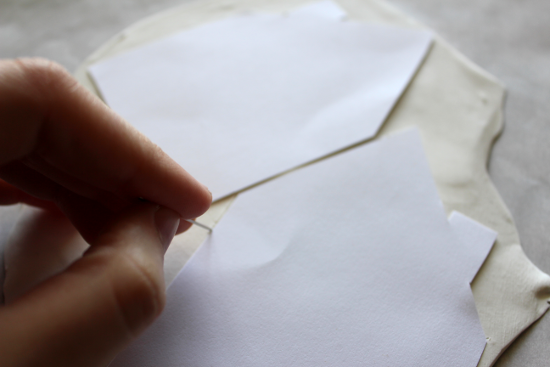
Then, roll out the polymer clay to about 1/4-inch thick and use the templates to trace the house shapes onto the clay using a stylus or, in my case, a needle. I lightly traced the shapes onto the clay at first, then went back and pushed all the way through the second time around. At this point, cut out a door and windows on both the front and back pieces.
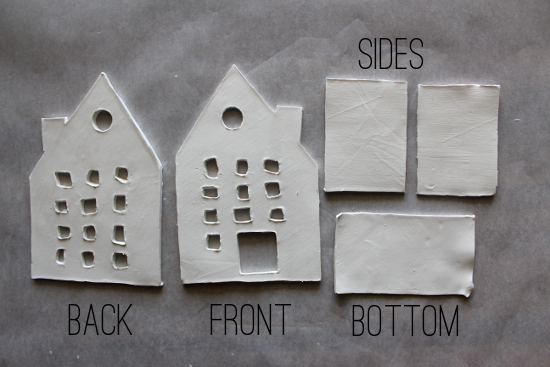
You should have a total of five pieces; a front and back, two sides, and a bottom piece. Start piecing them together by lining up the sides with the bottom and using spare clay to adhere them together. I didn’t get any pictures of this step but Claire does a great job showing how it’s done – with official tools! – for any visual learners.
Now that the hard part is over, bake the clay according to the package directions. And just to keep it real, this is what happened when I rolled my clay out too thin. So I made an identical one and now we can pretend that never happened, right?

The front and back sides of the house may come out of the oven slouching. If they do, prop them up straight before the clay hardens. I used two glass cups and that worked just fine.

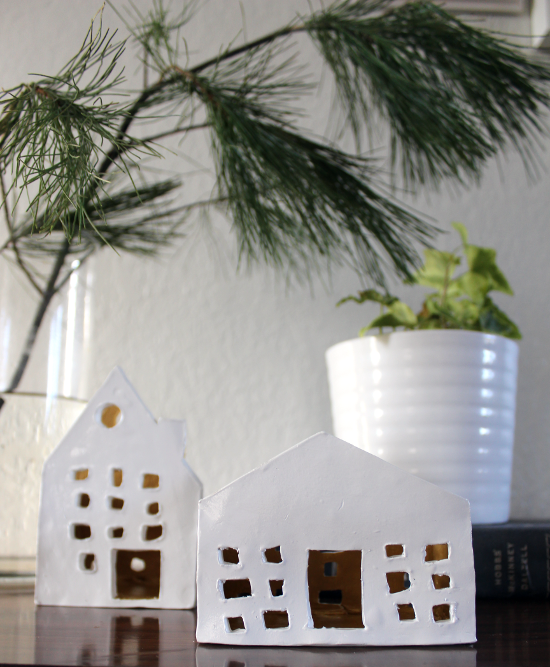
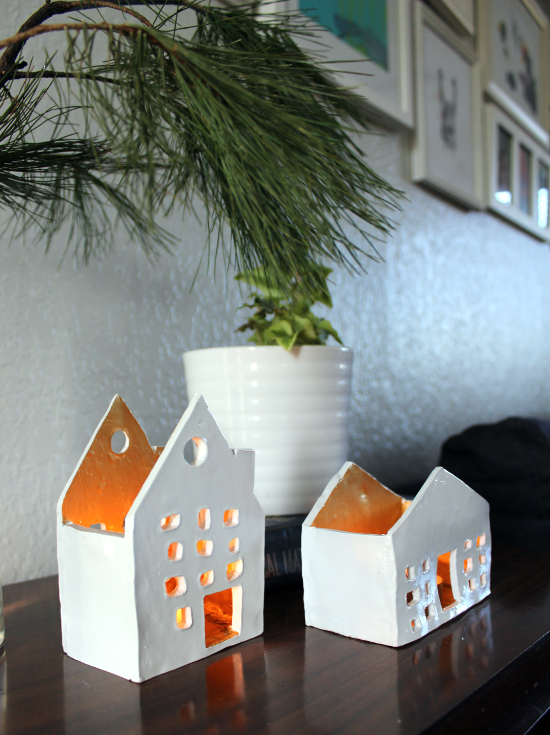
To give them a more porcelain look I painted the “exteriors” using high gloss spray paint after they cooled. I also painted the inside of them gold using Martha Stewart’s metallic craft paint. They are so far from perfect, but I really like how they came out.
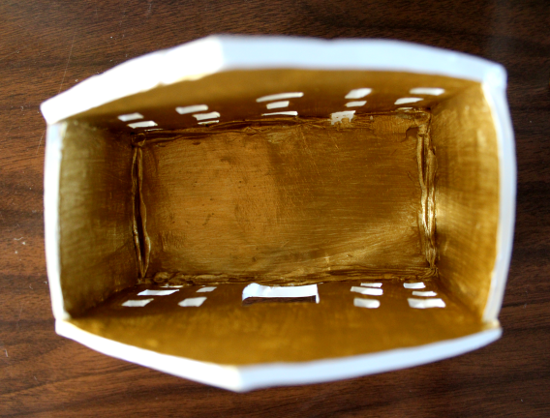
Here’s a peek at how the inside looks, which may give you an idea of how I attached the pieces together.
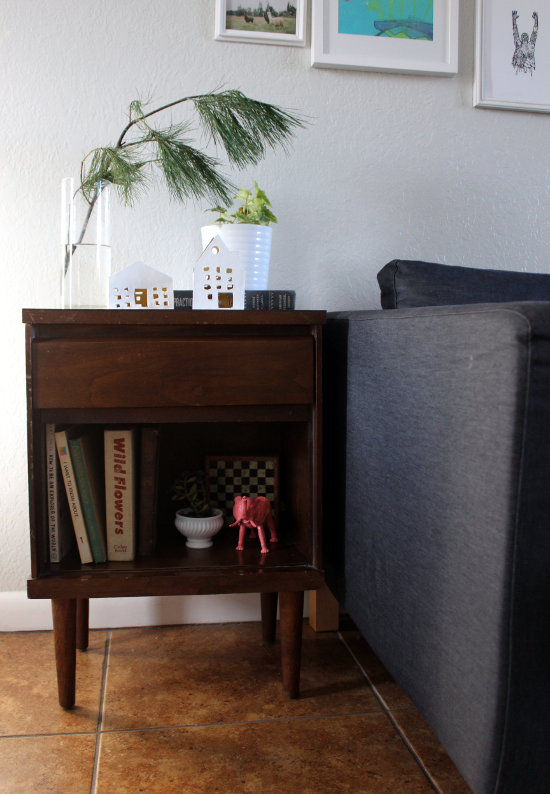
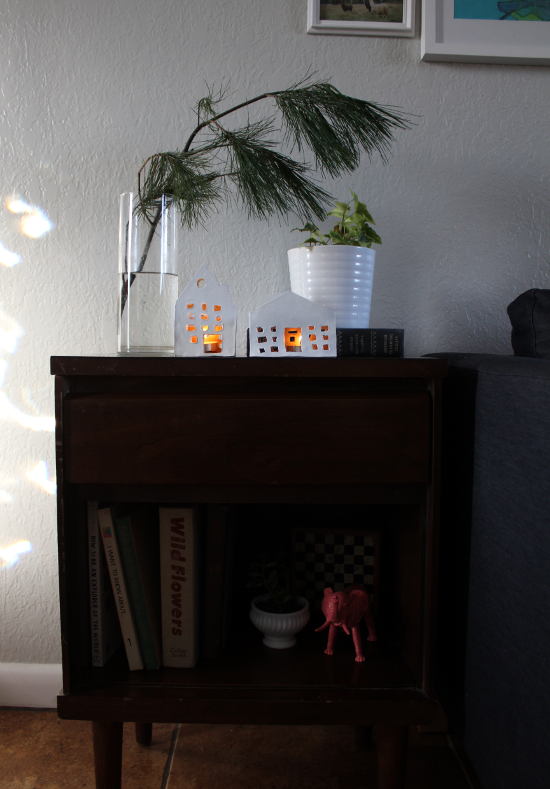
I especially like how they look holding tealight candles. It kind of distracts from the sloppily cut windows, don’t you think?
Overall this project was pretty easy. I have to admit though, Sculpey is a whole different beast than potters clay. I’m horrible with it – obviously – and found it pretty unforgiving. I’d pick regular clay over polymer clay any day but since I don’t have access to a kiln, I’ll stick with using Sculpey.


I think they're cute! Also, you might like to try air dry clay, it's a little easier to work with than polymer clay but also doesn't require a kiln!
Thanks, Alicia! I'll definitely try air dry clay next time, easier is my cup of tea!
ImproveNet is your guide for helping you complete home improvement and repair projects – from start to finish. Learn about your home and get matched sewing machines for beginners
I love it. Thank you for sharing!
Did you bake it all in one piece?? ( put together)
Yep!
I’m busy making a house similar but think I’ve got measurements wrong but it’s my first attempt at making a house. I’ve done tea light holder door plaques keyrings coasters. All from air dry clay. My favourite hobby. Yours looks great.