
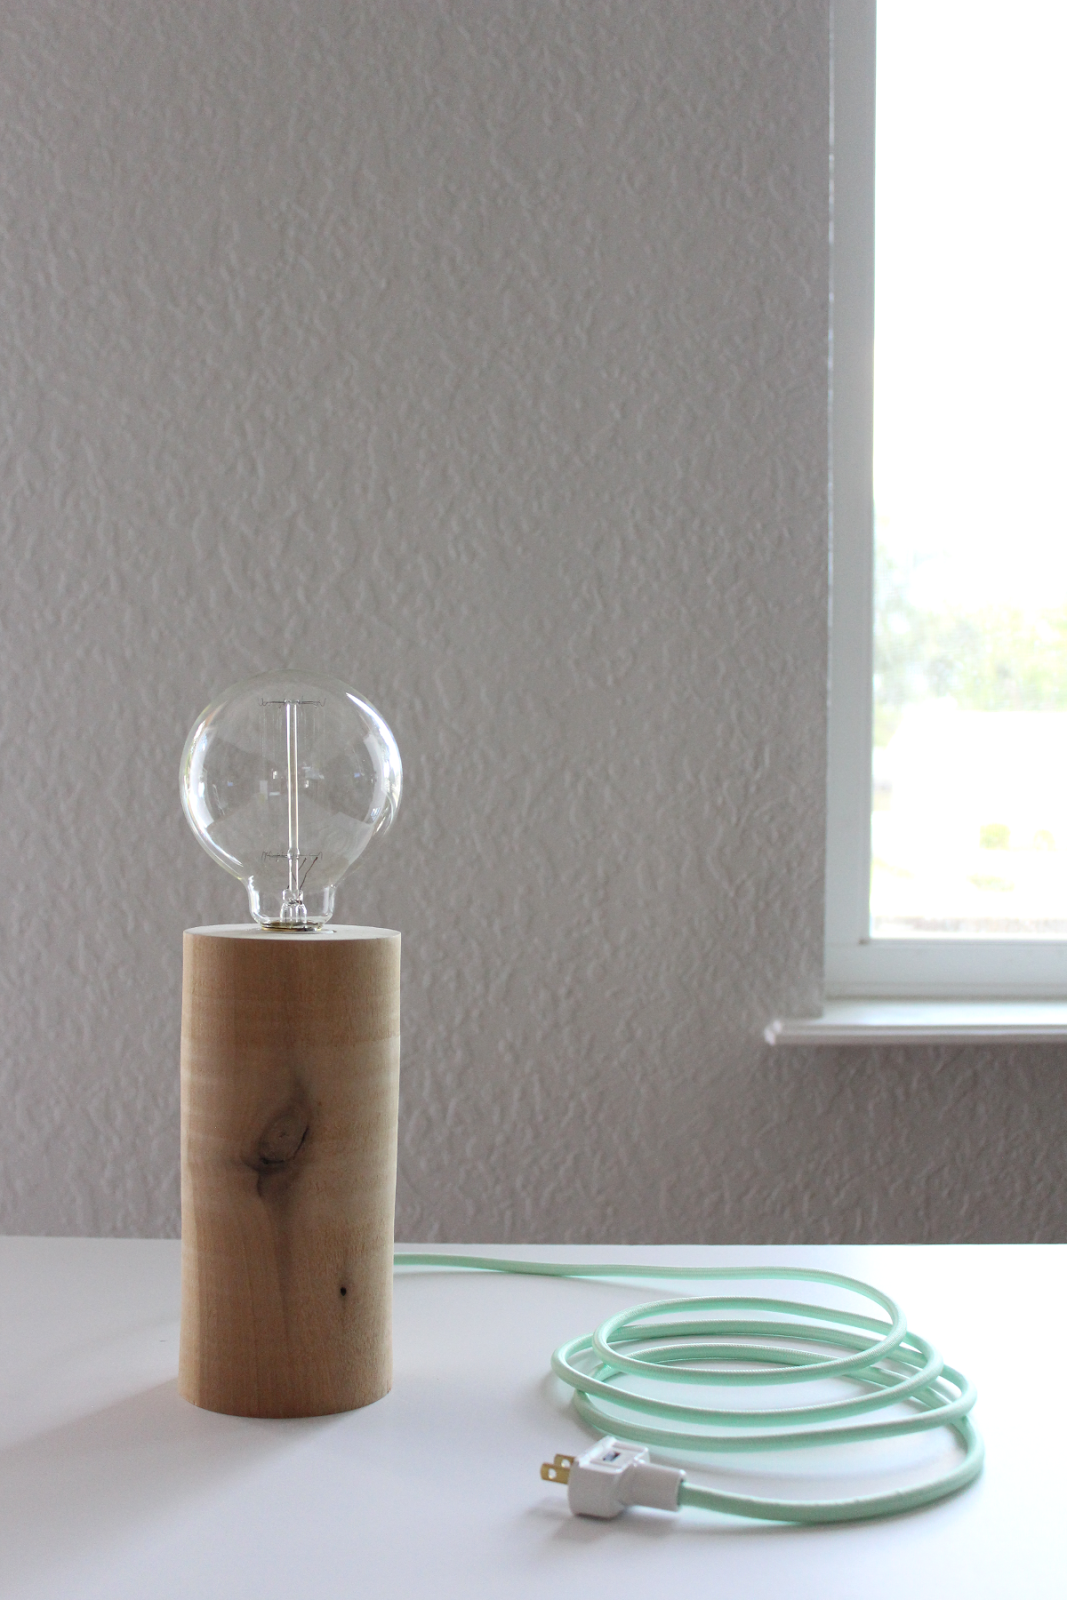
These lamps caught my eye several months ago on Pinterest and as I do with most things I see on Pinterest, I conspired to make my own. I acquired all the supplies and got right to work. I had the best intentions to finish it before Philip’s birth but things didn’t quite go as planned (much like his birth). But now! Now, it’s done. And I love it.
Here’s what you’ll need:
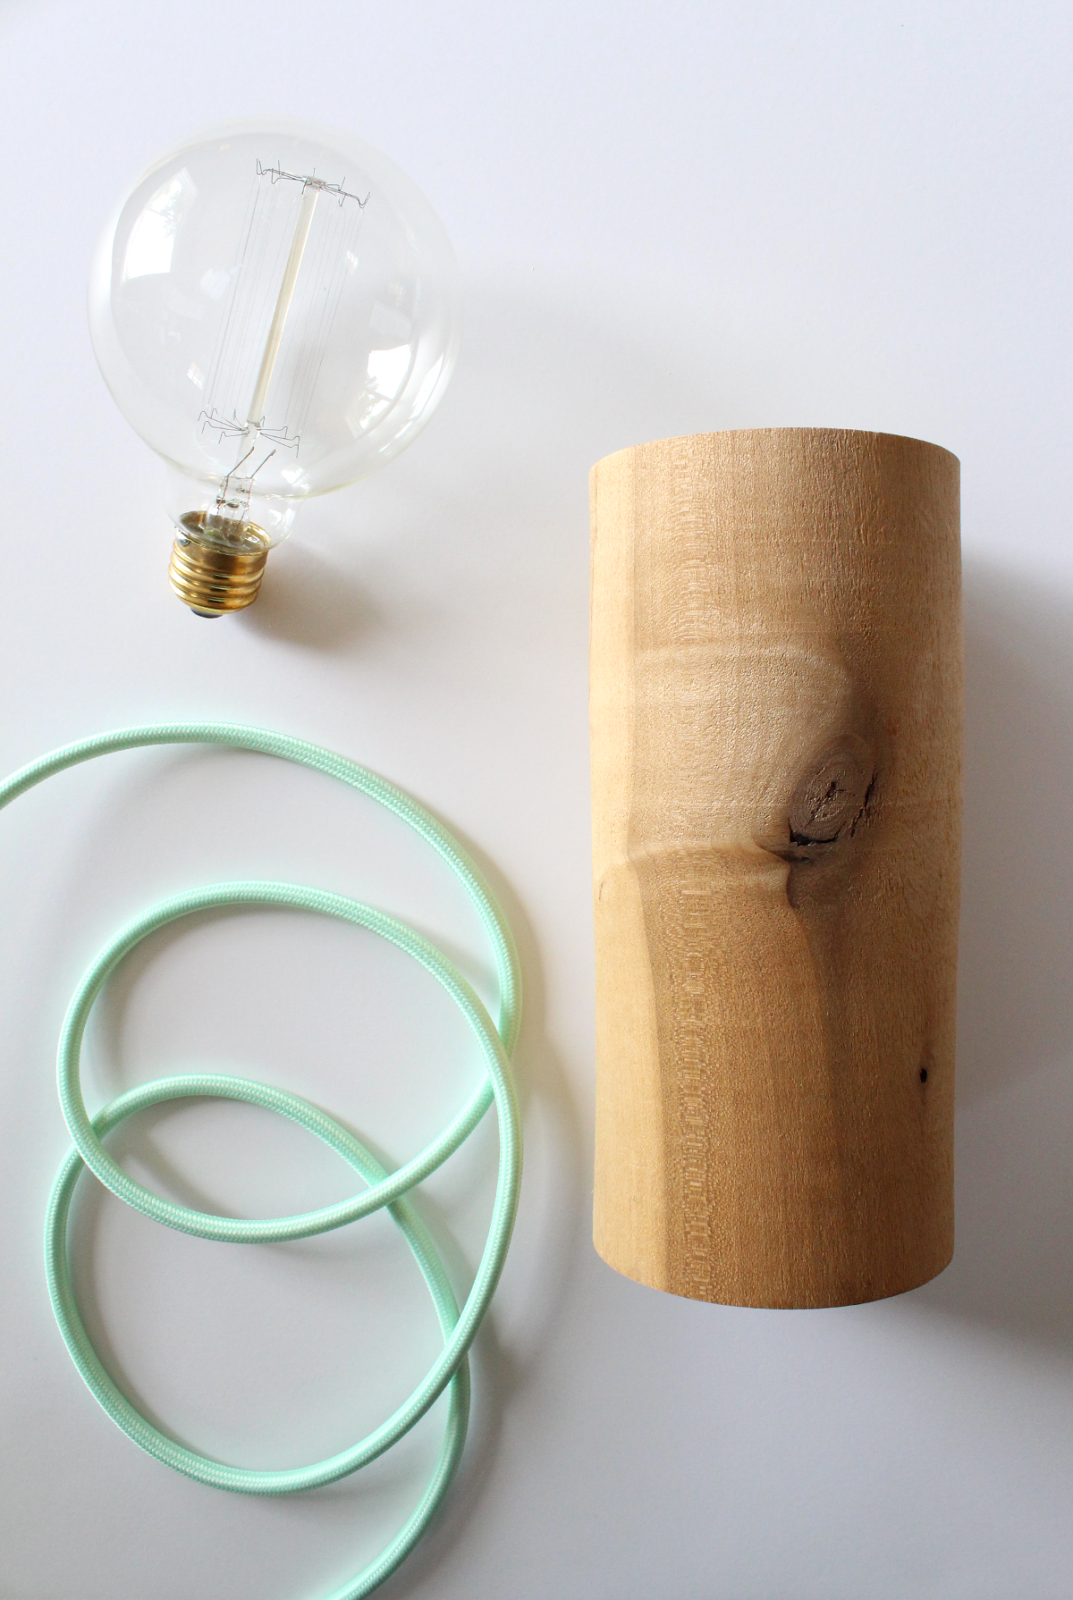
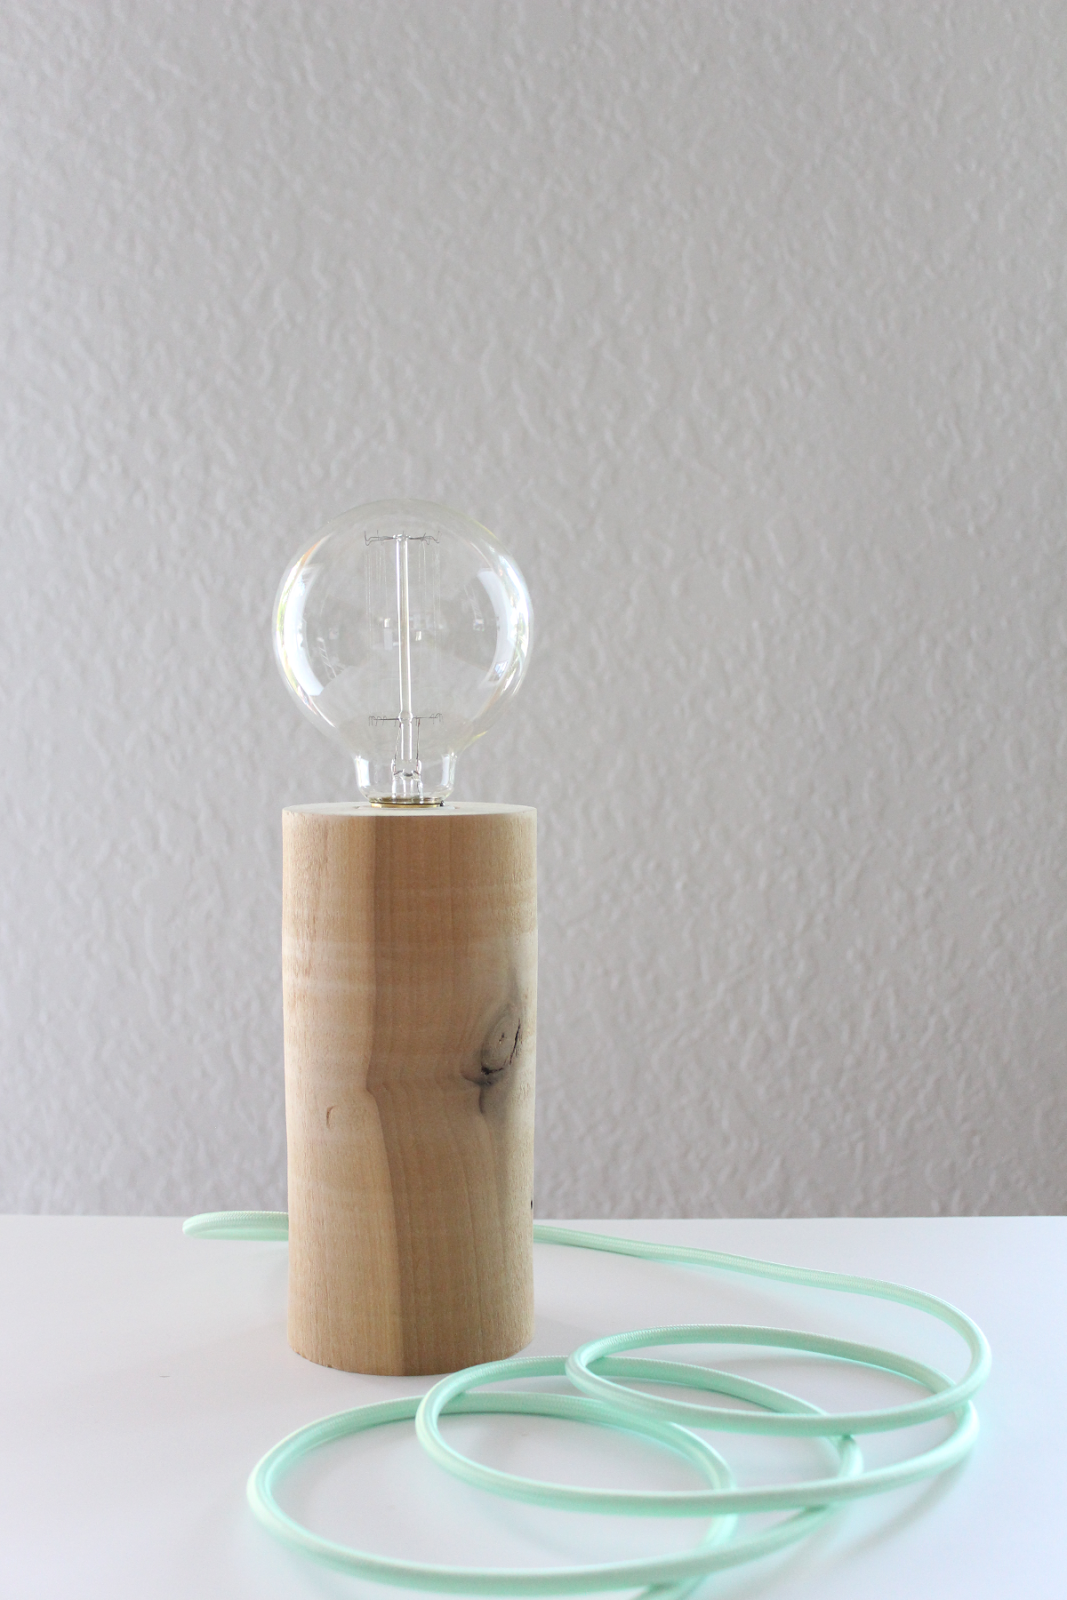
Large wood dowel*
Drill Bits: 5/8-inch, 1/4-inch, and 1/8-inch
Porcelain socket
Cloth covered wire (I got mine from Color Cord Company)
Rubber plug end (I found mine at Home Depot)
Thumb switch
Necessary tools for wiring a lamp: wire stripper and electrical tape
Here’s how it’s done:
Start by preparing your wood dowel. Find the center of the dowel (I kind of winged it) and drill a pilot hole using the 1/8-inch drill bit. Then, using the 5/8-inch drill bit, drill down from the top of the wood dowel. Stop boring out the wood when the hole is just deep enough to fit the porcelain socket. You want the socket to fit just under the top of the wood.
Once you have bored out a hole for the socket, start drilling further down with the 1/4-inch bit. I had to flip my dowel over and drill from the bottom in order to drill all the way through the dowel. Next, drill from the side of the dowel in towards the center until you meet the middle.
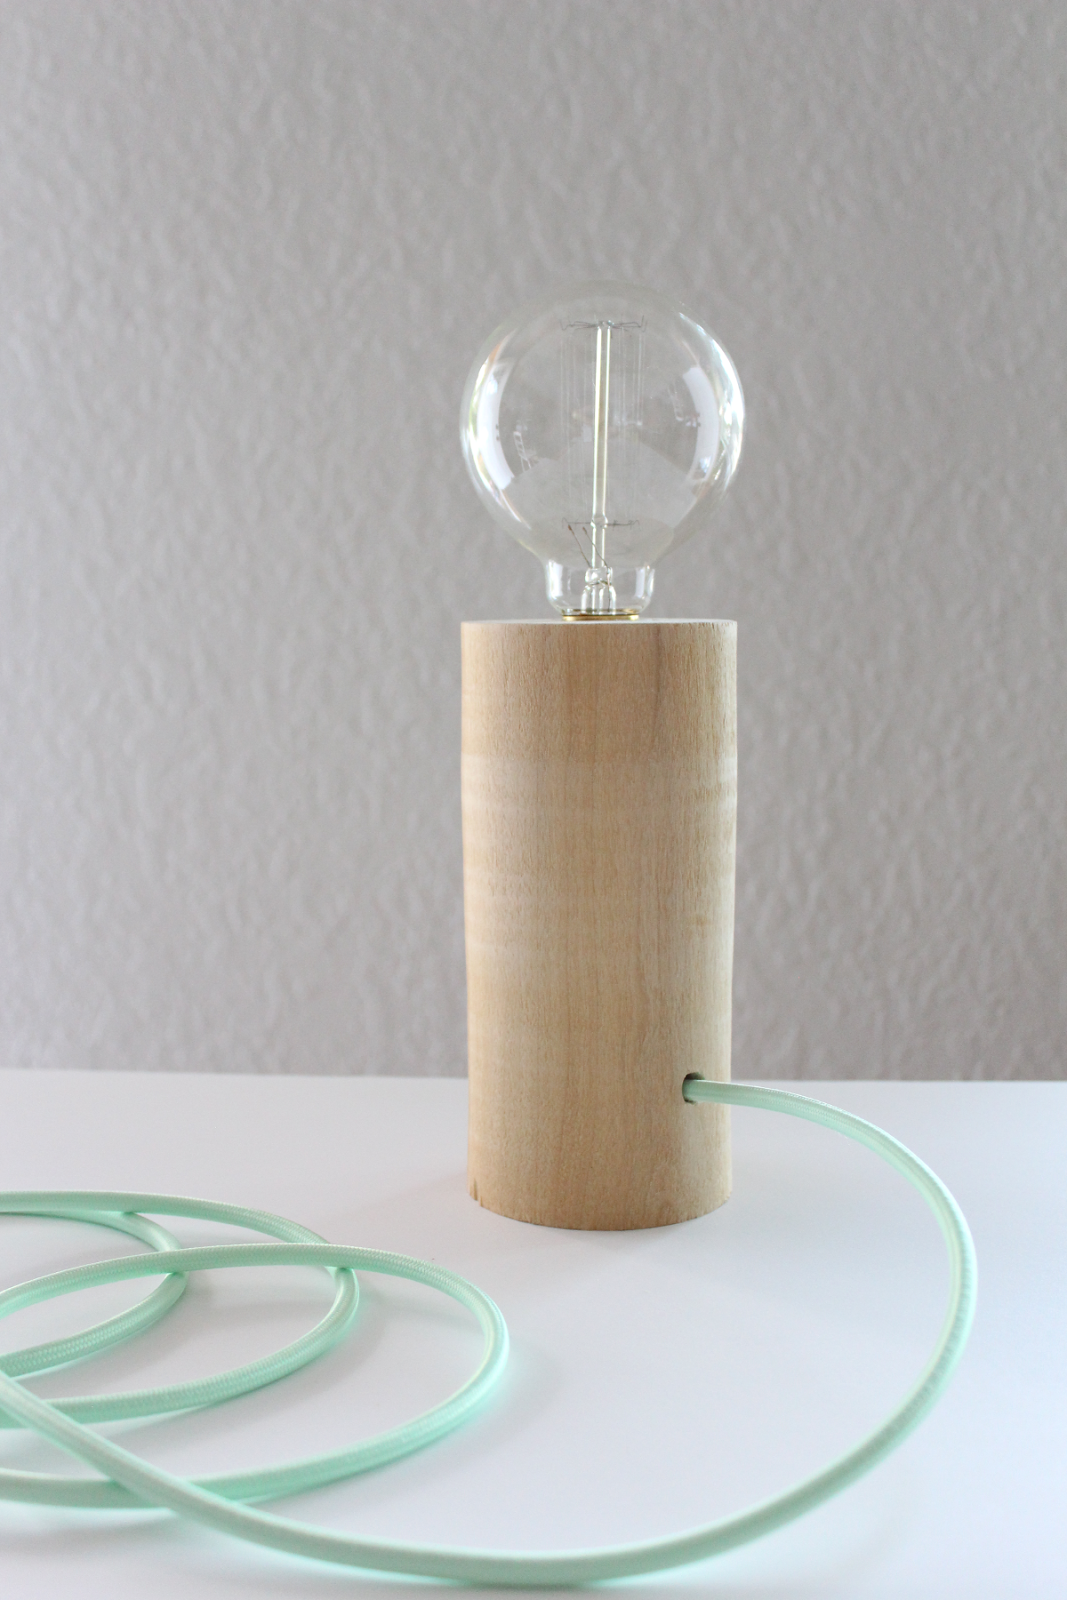
Feed the cloth wire through the holes until you have one end poking through the top and the side of the dowel. Attach the socket on the top end and the rubber plug on the other end. For detailed instructions on wiring a socket, check out this post. Wiring a rubber plug end is pretty much the same.
The cloth wire I purchased had a ground wire included. There was no need for a ground wire for this project (since my plug only had two-prongs), so I simply clipped off the ground wire and pretended as if it wasn’t even there. At this point you can also attach the switch. I ran out of time (as one with an infant does), so the switch isn’t attached in these photos.
Finally, firmly (but gently!) shimmy the porcelain socket into the hole. We (and by we I mean my husband) wrapped the socket in electrical tape to prevent it from wobbling around.
*A note about the base: I searched high and low for a big enough dowel that would work for this project. I ended up finding this piece at a local exotic wood store. It was a scrap piece that a former employee had lathed out of a piece of poplar. I am no woodworker. Since there was no way I could have made my own large dowel, I was ecstatic to find one already formed. If you have no access to a lathe and can’t find a large dowel pre-made, you can always made one of these lamps out of a simple 4×4 post.
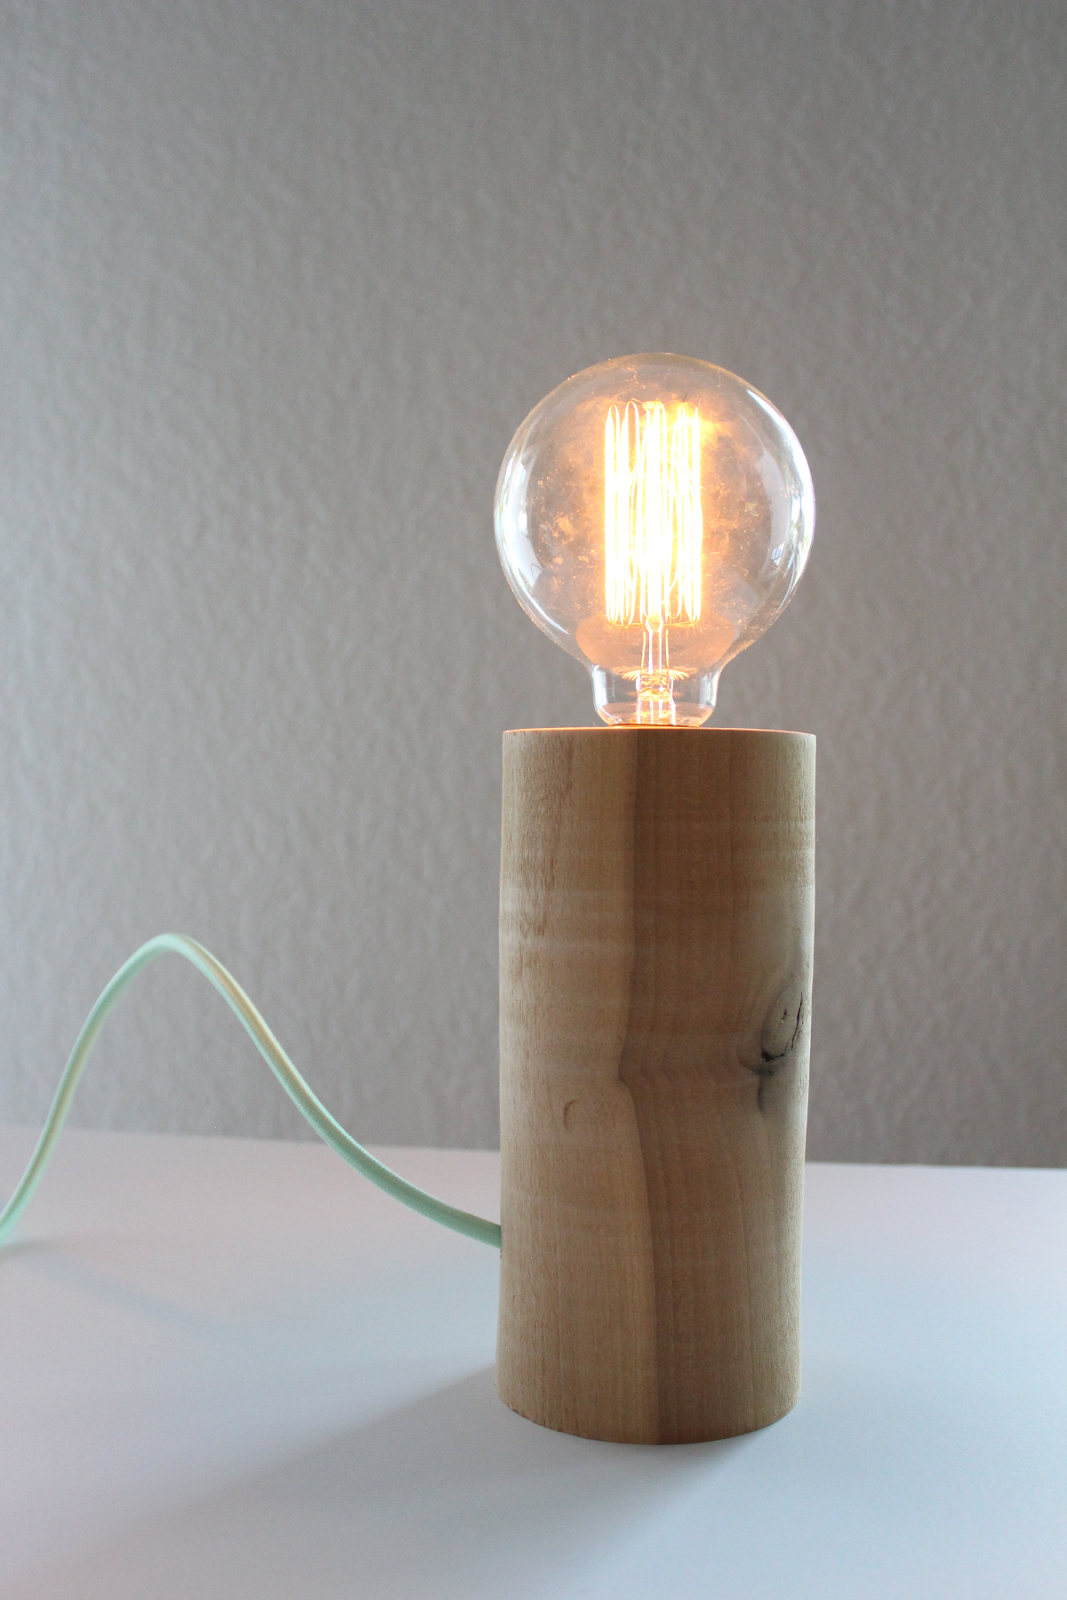
It may be my favorite lamp to date. Although this copper and wood one takes a close second.


This is way too cute! Pinning! Found you via our blogtalk group on FB. =)
That's a fun lamp and now you've got my head spinning with ideas. Sharing on FB and pinning 🙂
Oh, this is brilliant 🙂 Where i can find in London light bol like this on the pictures ???? The Idea is amazing 🙂 Thank you!
What a lovely idea for my new home. I would consider it. Thanks a lot!
Very Scandinavian, very stylish…
Great idea 🙂 I love it.
Can we put the exit for the cable under in the bottom somehow?
You could do that by drilling the hole through the the bottom and cutting a notch for the cord to exit. I did this for another lamp and it worked out well: http://www.turningithome.com/2014/05/copper-wood-table-lamp.html
[…] DIY Wood Lamp from turningithome.com […]